Mastercam 2023 now gives you choices for mapping colors identically or independently in the main interface and the Mastercam Simulator often referred to as Mastercam Verify. In previous versions of Mastercam, color mapping in the main interface was completely independent of the Simulator and was also tied to the simple 256-color palette of Windows. However, the Simulator uses the HTML color palette which, while it supports many more color definitions, uses a different naming convention that may be unfamiliar to some. Now, one simple checkbox in the Simulator options links your main system color settings to the simulator defaults.
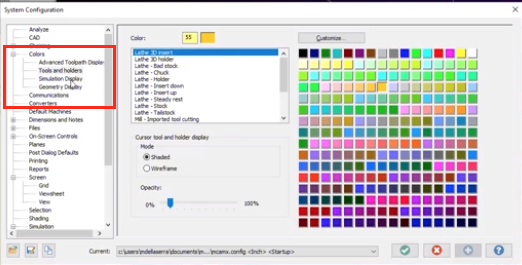
At the top left corner of the screen, go to File/Configuration/Colors and highlight the item called Mill – Tool Cutting. Note that the color shown in the box above has the number “55” next to it.
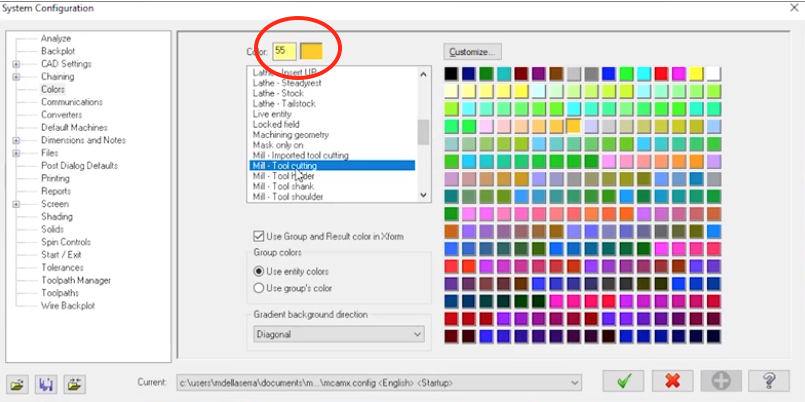
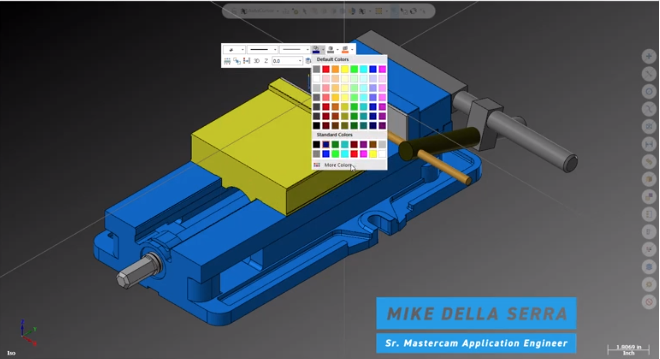
This is one of the 256 colors defined in the simple windows mapping system. However, when running the Simulator, the rendered colors shown for the part, stock, fixtures, tool components (meaning cutting length, shoulder length, shank), and tool holder have some differences.
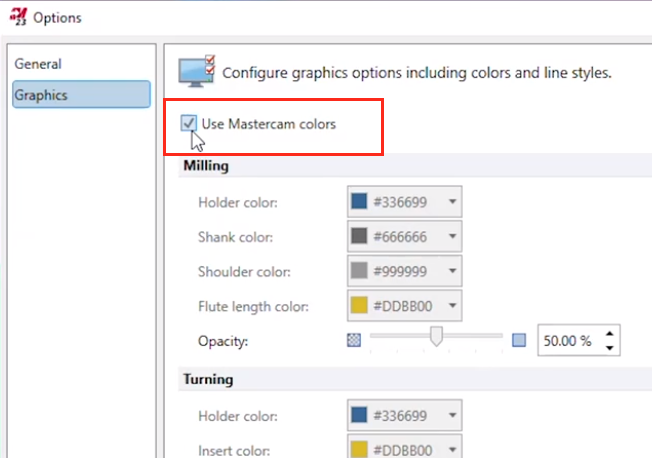
In the simulator window, go to File/Options/Graphics. Now, you will see that the color definitions are radically different.
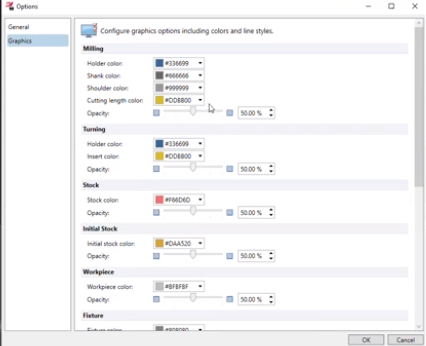
In simple terms, these color “numbers” are using hexadecimal in place of decimal values which, while yielding many more choices and combinations, can be confusing to someone not used to working with them.
In Mastercam 2023, there are new branch options for defining the simulation display. These definitions are still using the 256-color Windows palette. Once the colors are defined here, the new Machine Group Setup makes it easy to choose the desired colors for the part (also known here as master model), stock, and fixture geometry.
Now, if you go back to File/Options/Graphics and use that single simple checkbox at the top that says Use Mastercam Colors, it allows you to override the HTML color palette options and use the definitions from the main interface. You can save all these settings by following the on-screen prompts. It is that easy!
As you can see, Mastercam gives you a choice between simple display options and more advanced ones if they are desired. All it takes is a few mouse clicks. Please be sure to sign up for our 2 Minute Tuesday video series to receive tips and tricks like this one in video form every week. More info at the button below.


Leave A Comment