By Jason Matses on July 31, 2015
Finishing and painting 3D printed parts is easy and can be done following these few steps. Painting and finishing can transform your 3D prints into highly aesthetic parts, giving them appearance of production parts. Prototypes, concept models, and end-use parts can all be finished to presentation-quality in the matter of hours. The four main steps we will cover here are: Preparation, Sanding, Priming, and Painting.

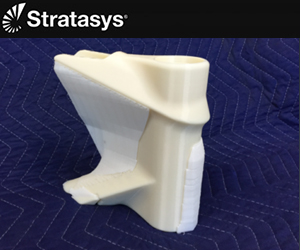
3D printed bike part with support material.
This part was printed in ABS-M30 plastic at 0.010” Layer resolution on a Fortus 250mc printer. It is fresh off the printer so it still has support material on it (which is white).
Prepare
Remove support material, either by hand or dissolve it away if necessary. Rinse part thoroughly in warm water.

Cleaned part, all support material removed.
Sand
Sand the areas of the part that will be painted. Start with a rough grit like 150 or 220 grit sandpaper. Once most of the layer lines have been smoothed out move to a 300 to 400 grit sandpaper. Keep in mind starting off with a part printed at 0.007” or 0.005” layer resolution will be a smoother part requiring less sanding. On the other hand, you can print a part much faster at 0.013” layers (if your machine allows) but the larger layer height will require more preparation to get smooth. Once sanded thoroughly with a 300-400 grit sandpaper, wash the part with warm water to remove any dust from sanding and allow to completely dry.
Prime
Hang the part in a well-ventilated area. Use a “high-fill” sandable primer. Apply several light coats, allowing for the appropriate amount of time in between coats as directed by the can. Once fully covered in primer, inspect the part. If striations are still visible, go back to sanding. An 800 grit sandpaper is good for smoothing primer. If there are any large irregularities in the surface that can’t be sanded out, use a modeling sanding putty like Tamiya Putty or Squadron Green Putty to fill in gaps, let dry and sand smooth. Re-coat with primer if sanding putty was used or too much primer was sanded off.
Paint
Still hanging in a well-ventilated area, coat the part with several coats of paint. Canned spray paint or paint from a spray gun can be used to paint 3D printed parts. Allow for appropriate time between coats. Inspect surface of the part to make sure you have 100% paint coverage where you need it. Apply several coats of clear enamel gloss to add shine, protection, and a deeper contrast to the part’s appearance.
Allow to fully dry about 24 hours before handling.
Watch the process in the video below.


Leave A Comment