Today we are going to discuss how to properly set up your PC to use a high-performance graphics card. If not plugged into the High-performance card, your Mastercam software might seem a bit slow, sluggish, or worse, it may crash either during startup or when you are using the software. Overall, Mastercam is a graphics intense application that requires more power than what the onboard graphics can provide. Using high-performance graphics cards helps the software run smooth.
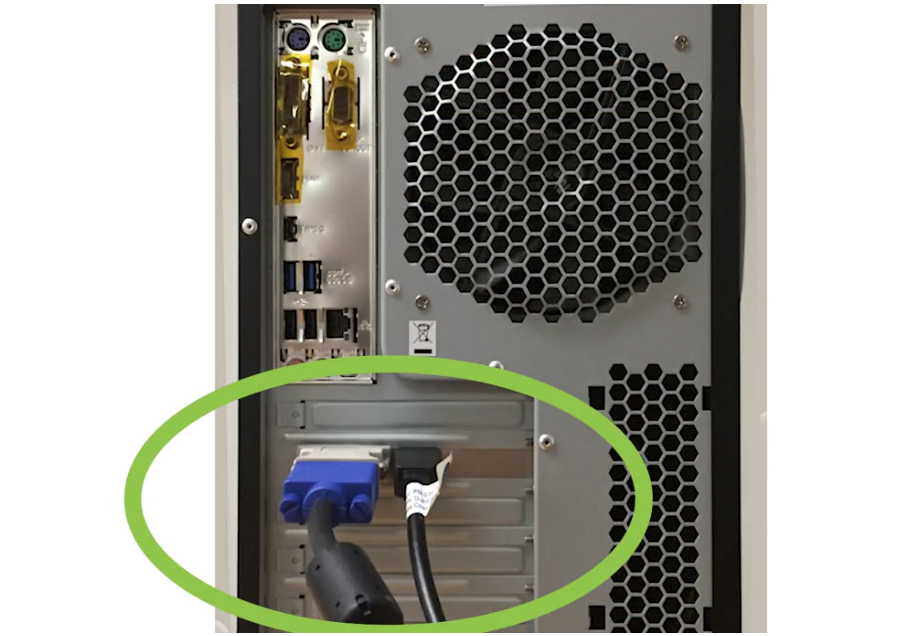
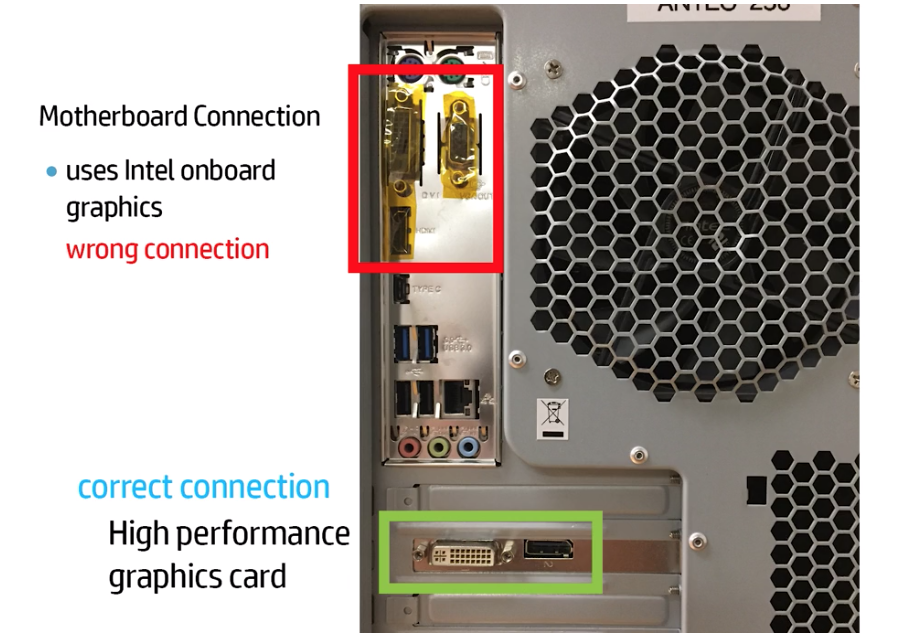
The first thing you should do is look at the back of your computer tower. There are a few different options to plug in a monitor. The first set of connections is for the motherboard, which uses the Intel onboard graphics that come standard with the PC. The open ports down towards the bottom of the tower are for the high-performance graphics cards.
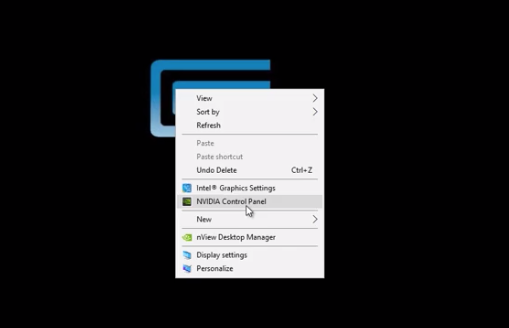
Once you plug into the right port at the bottom, you can now go back into the Nvidia Control Panel. Do this by right-clicking on your desktop as shown below.
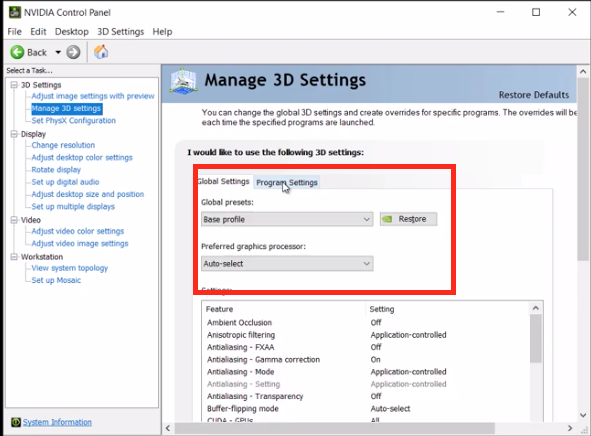
Now choose the Manage 3D settings option and click on the Program Settings tab.
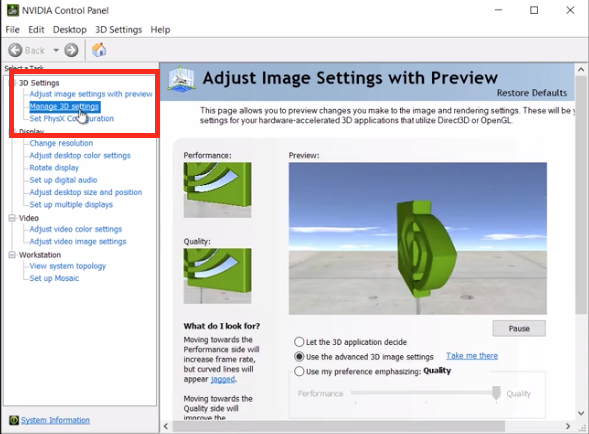
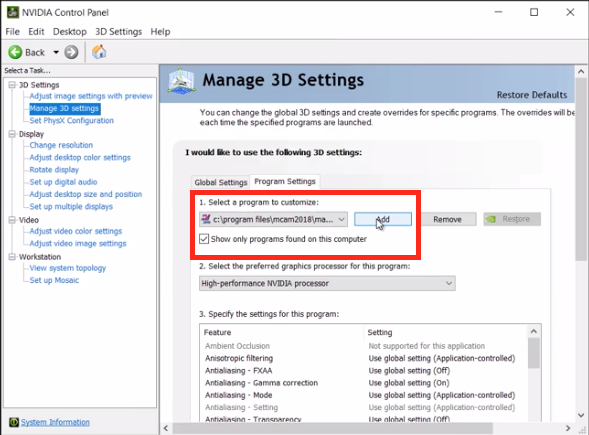
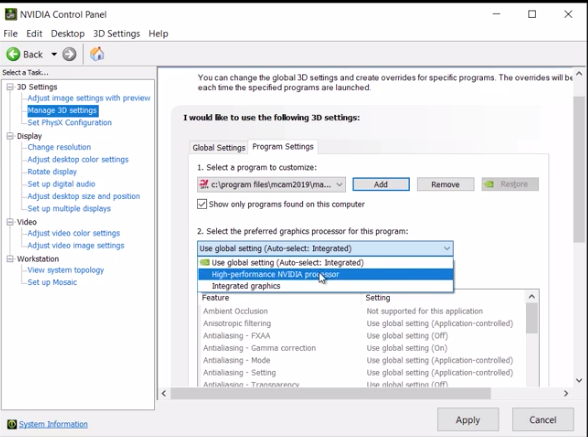
Next, we can add Mastercam to the list and set the CUDA-GPU and the Open GL Rendering options to use the high-performance GPU.

As you can see, properly setting up our graphics cards for Mastercam is quick and easy.
Please be sure to sign up for our 2 Minute Tuesday video series to receive tips and tricks like this one in video form every week. More info at the button below.

Leave A Comment