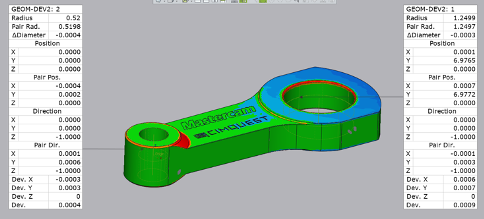
Geometry Deviation is a tool for measuring essentially everything that might be relevant for size, orientation, and location for a specific feature. For example, when measuring geometry deviation for a cylinder, the criteria of interest would likely be the size, location, and centerline axis direction as they all compare to the nominal (exact) CAD model.
As you review the data blocks below, Control X can compare the scan data values to the CAD data values and show the results in clear, unambiguous text blocks. “Paired” information is the data relative to the scan as it compares to the CAD model. The values are based upon the current coordinate system.
To dig deeper into the ‘Form’ of any cylindrical feature on your part, Cylindricity may also be analyzed using Control X in order to check the general Roundness of a cylinder across the complete length of the feature. Min and max values for the Cylindricity test are shown below. Notice datum information isn’t required to test Cylindricity.
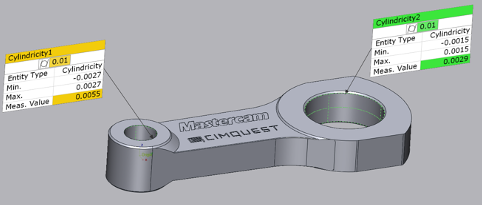
As you may recall from last month’s Metrology Minute, Fitting Deviation Maps may also be turned on for each cylinder to dig deeper into exactly where Cylindricity may be off. In reviewing the isolated deviation color map, one can gain great insight as to exactly where the Cylindricity values are off and perhaps come to logical conclusions as to which manufacturing process(es) contributed to the ‘out-of-spec’ results.

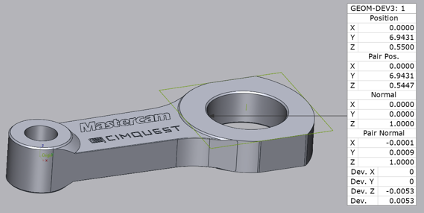
Geometry Deviation may be checked for closed 2D Features such as circles, slots, rectangles, and planes as well as 3D Features like Cylinders, Cones, Spheres, and Tori.

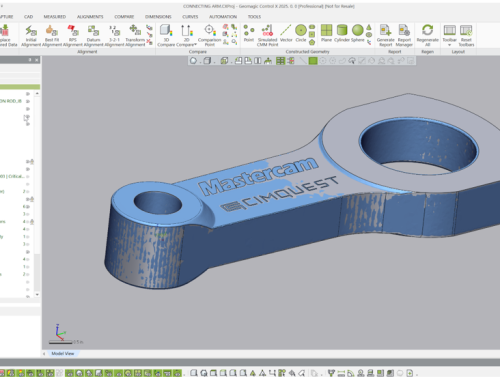
In our example above, we utilized both the Geometry Deviation tool combined with the Cylindricity GD&T callout to derive a great deal of information regarding spot-drilled, rough drilled, reamed, and bored holes in our connecting arm.
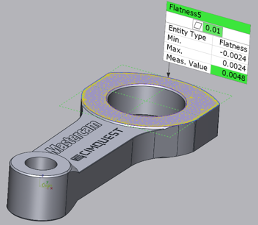
If checking Planes on the same part, for example, we could use the Geometry Deviation tool to pull a great deal of information about the machined plane faces as well and the GD&T Flatness callout would again help to fill in the missing pieces.
The Flatness GD&T test with Deviation Color Map turned on can fill in the missing pieces of information.
That will do it for this month’s Metrology Minute. Please contact Joel Pollet with any questions or comments. jpollet@cimquest-inc.com.


Leave A Comment