Today we are going to cover how to update your previous Mastercam version resource files to Mastercam 2019 using the Migration Utility.
To begin, first create a temporary source folder for the Migration Utility to access and name it ‘update.’ You will place copies of the contents of the Shared Mcam folder inside this new update folder.
This will leave the previous installation undisturbed. You can remove all but the files that have custom settings from these copied folders (if you are confident in doing so).
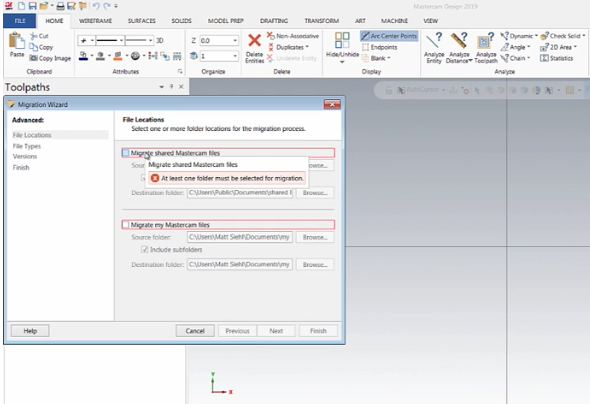
Next, launch Mastercam 2018 and go to File / Convert / Migration Wizard. Select the Advanced option and the screen will change to display the File location selection options.
Check the box labeled Migrate Shared Mcam Files and use the browse button to navigate to the update folder. Make sure to check the box labeled Include subfolders then click Next.
It is important to review the file types branch and de-select files you don’t need for maximum efficiency. Click Next, de-select the unused versions, and click Next again.
On the Finish tab make sure to carefully review the source and destination folders, the file type and version summaries and then click Finish.
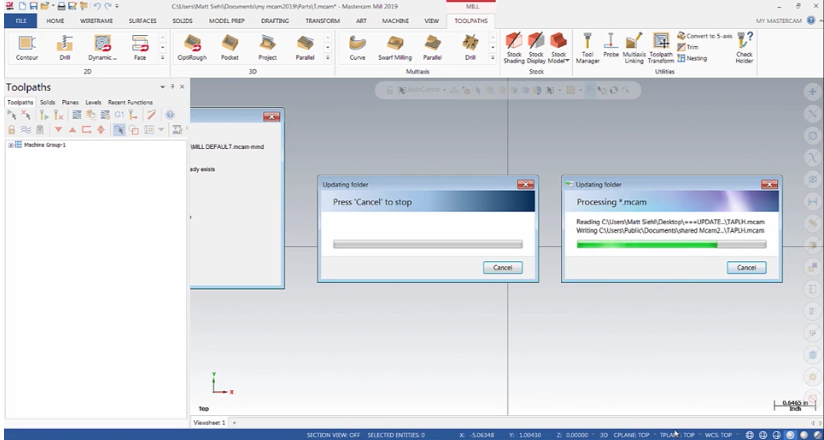
A progress indicator window will pop up and you may, at times, see items flash through the Toolpath Function Manager as the update proceeds.
When the process is complete the system will display a message box. Select Yes then close the event log.
Finally, go to File / Configuration / Start/exit. Set your startup preferences, then go to default machines and select the machines you want as defaults. Save the changes and Exit. The next time you start up Mastercam, your custom settings will be used.
As you can see, Migration to a new release can be easy if you follow a few simple steps.
Please be sure to sign up for our 2 Minute Tuesday video series to receive tips and tricks like this one in video form every week. More info at the button below.






Leave A Comment