Today we are going to cover how to use Autodesk Netfabb to create lattices with two of Netfabb’s internal tools, Lattice Assistant and Lattice Commander.
Autodesk Netfabb is Additive Manufacturing software that allows you to repair, prepare and build your parts. Lattice Assistant and Lattice Commander are currently available as tech previews, and included in Netfabb Premium and Ultimate.
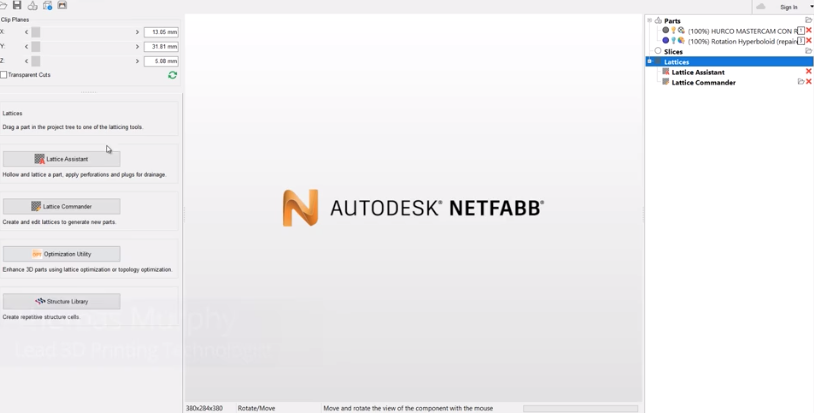
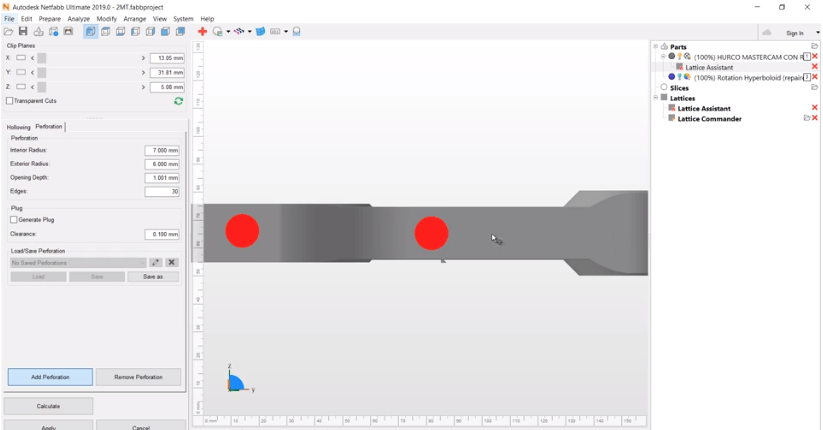
The first tool we will discuss is Lattice Assistant, which combines hollowing, lattice generation and merging with tools to generate perforation and the matching plugs for drainage of unused material.
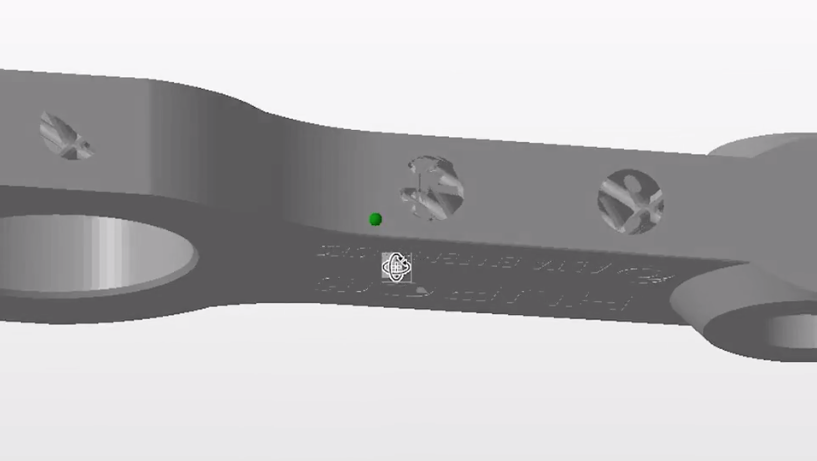
Shown below is a connecting rod used for one of our Mastercam events. It is fairly thick, and you can see the various options from the thickness of the skin to size and shape of the lattice cells in the dialogue box on the left.
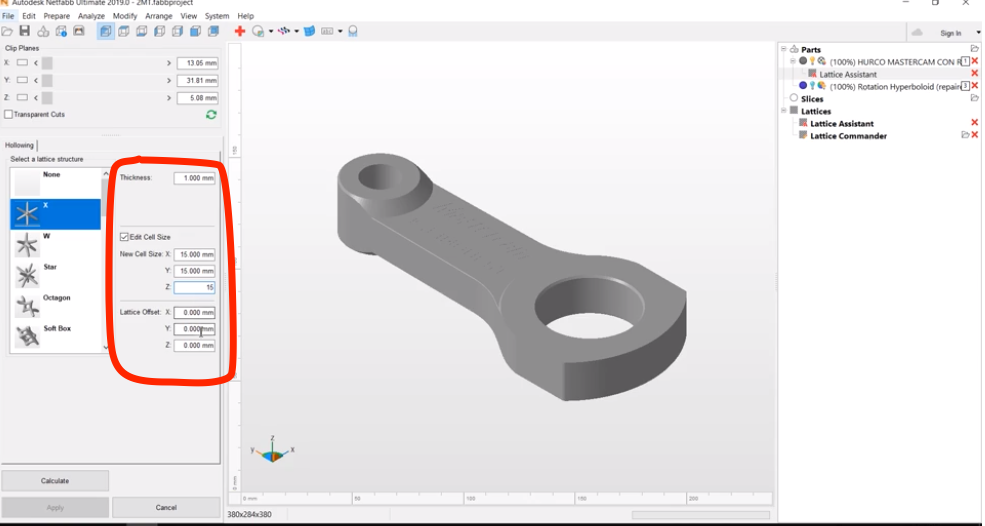
In this example, we selected a simple X cell and hit calculate. With the part hollowed and latticed, we have to add perforations in order to be able to remove the unfused powder which can be reused in the HP JF 4200.
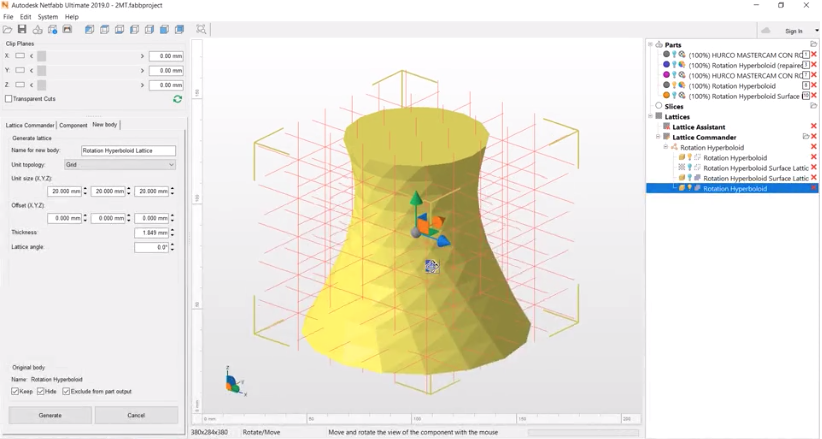
The second tool for latticing is Lattice Commander, which can be used to create and modify the individual lattices and wall sections, or skins, for a project.
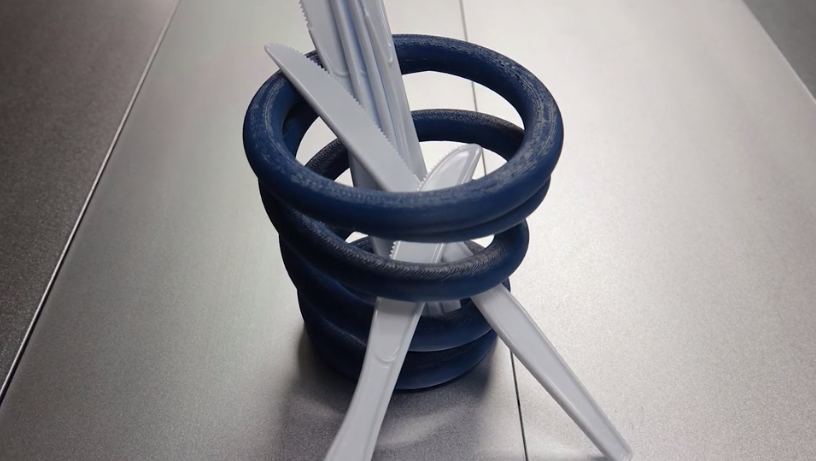
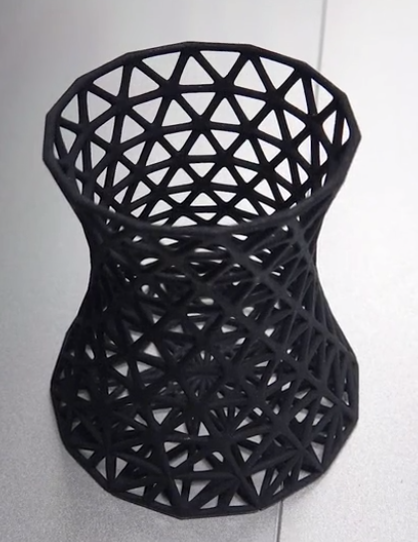
With this tool, we created a simple utensil holder for our kitchen because our old one allowed for the knives to fall out through the sides.
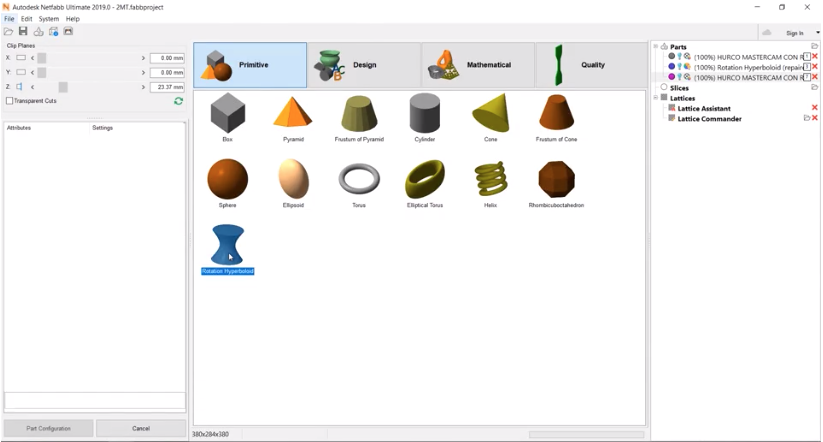
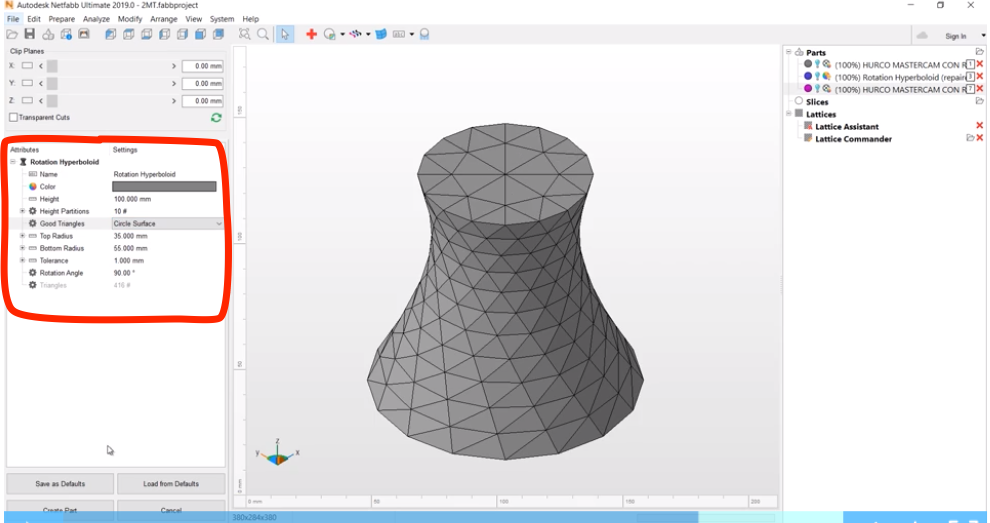
Using the parts library, we can open a rotation hyperboloid and change a couple of settings to fit the size we need.
In order to create a surface lattice, the software uses the edges of the triangles so we changed the tolerance of the model to 1 mm and turned on the good triangles for the top and bottom as shown below.
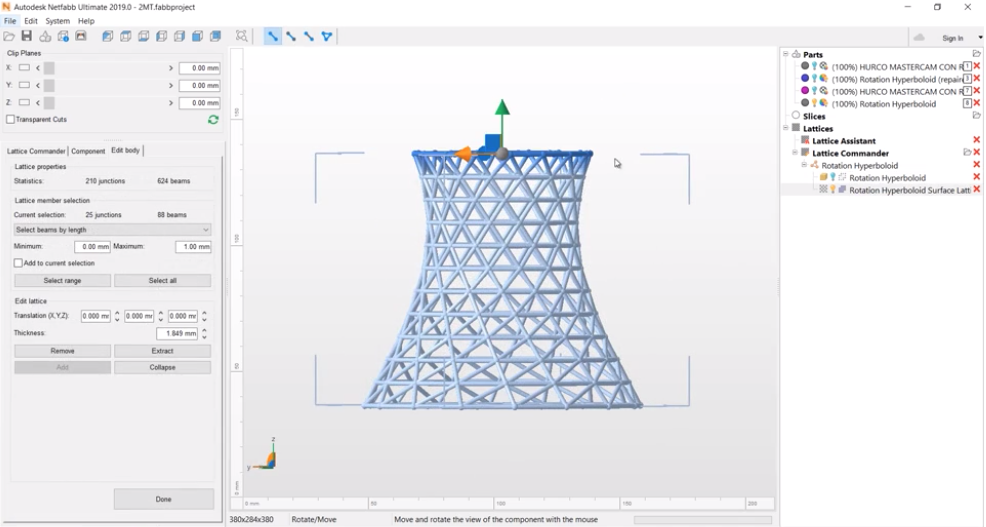
For our utensil holder, we made a lattice around the part. The beams appeared, but we then needed to edit the lattice to make an opening.
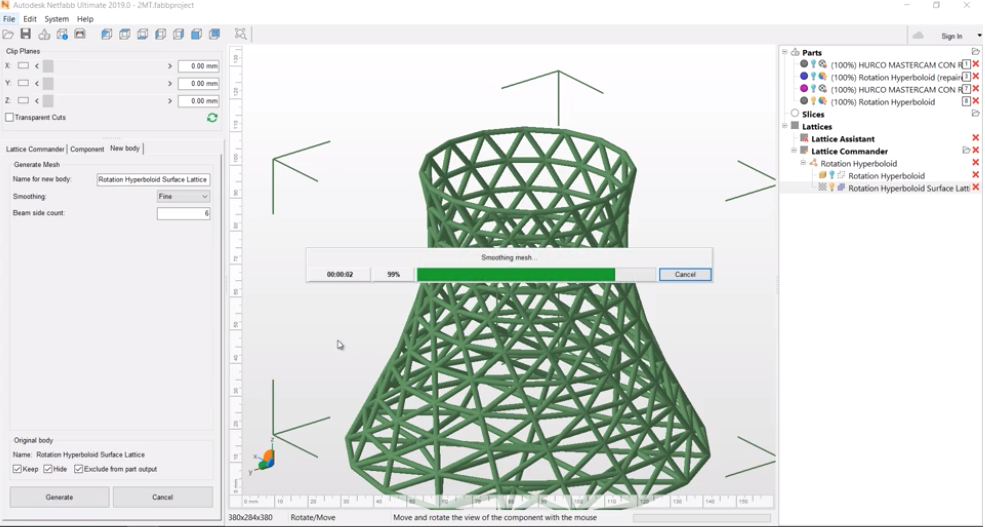
After deleting the top we generated the mesh and took the part into the workspace to prepare it for printing.
For more information on Autodesk Netfabb, please click the button below.


Leave A Comment