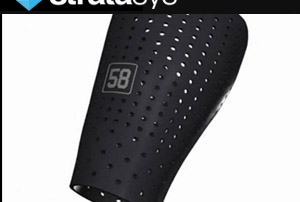
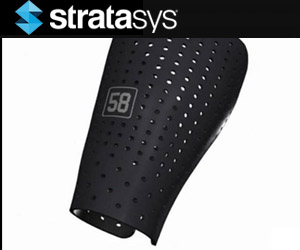
Injured Football Player Wears 3D-printed Brace in Super Bowl
Carolina Panthers All-Pro linebacker Thomas Davis suited up with a custom-printed arm brace to protect a nasty fracture during last night’s big game. Photo: Getty Images Davis broke his arm in the game leading up to the Super Bowl, but he was’t about to let that stop him from playing in the big game last night. With the support of a 3D-printed brace he was ready to take on the tackles and last night he survived five of them. Despite breaking his arm just two weeks ago and also having had surgery to have a metal plate and 12 screws inserted, it seems like a far-fetched miracle that he was able to play. Whiteclouds’s line of 3-D printers. PHOTO BY WHITECLOUDS 3D-printing company Whiteclouds developed and printed the brace to protect his arm on one of their Stsratasys Connex printers. Whiteclouds doesn’t make medical devices, per se. It’s the world’s largest full-color 3-D printing facility, and can print just about anything you can imagine. Its 53 employees know exactly what they’re doing when it comes to 3-D printing, but this was a new one. They didn’t have time to prototype and iterate, or to stress-test their designs. They [...]

Stratasys 3D Printing Keeps NASA Satellite On Time and Budget
There has been a new frontier in aerospace 3D printing. Last year Stratasys Direct Manufacturing partnered with NASA’s Jet Propulsion Laboratory (JPL) to 3D print 30 antenna array supports for the FORMOSAT-7 Constellation Observing System for Meteorology, Ionosphere, and Climate (COSMIC-2) satellite mission. A computer-generated image of the FORMOSAT-7/COSMIC-2, scheduled to launch in 2016. Image credit: NSPO, NOAA, NASA/JPL, UCAR, SSTL Scheduled for launch this year, the COSMIC-2 mission marks the first time 3D printed parts will function externally in outer space. The antenna arrays will capture atmospheric and ionospheric data to help improve weather prediction models and advance meteorological research on Earth. In order to keep the project on time and on budget, NASA needed an alternative to machining the parts out of astroquartz, the material traditionally used for antenna arrays. They turned to Stratasys Direct Manufacturing to produce 3D printed parts that could handle the complex array designs and also be strong enough to withstand the environmental demands of outer space. The complex arrays are made of ULTEM 9085, a high-strength FDM thermoplastic that was tested and met NASA class B/B1 flight hardware requirements. Image credit: Stratasys Direct Manufacturing Stratasys Direct Manufacturing built the custom-designed parts using [...]
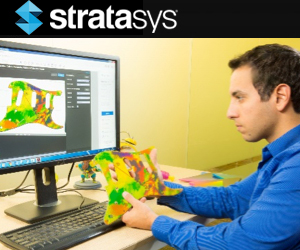
Stratasys Partners with Adobe to Broaden Adoption of 3D Printing
Stratasys has taken color 3D printing to a new level of realism and accessibility with the release of Stratasys Creative Colors Software, powered by the Adobe 3D Color Print Engine, for its Objet Connex3 3D Printing solutions. The new software solution combines advanced color management with a direct design-to-3D print workflow, and is an important step in Stratasys and Adobe’s shared vision of making 3D printing more accessible and easier to use while increasing creativity. Statasys Creative Colors Software powered by the Adobe 3D Color Print Engine introduces a simplified design-to-3D print workflow, accurate previews and new streamlined ultra-realistic experience to 3D printing. Joining Forces to Bring Color Freedom to 3D Printing, and Color 3D Printing to Everyone Stratasys Creative Colors Software brings the power and freedom of 3D printing to more designers around the world. By forming a direct bridge between Adobe Photoshop CC and Objet Connex3, it enables designers to easily 3D print their most imaginative creations without cumbersome 3D printing workflows. And Stratasys Creative Colors empowers designers with an enhanced color experience, including vibrant gradient color pallets with expanded color spectrums, improved textures and patterns support, as well as accurate, time-saving color previews. Ultra-easy Color Management, Ultra-realistic 3D [...]

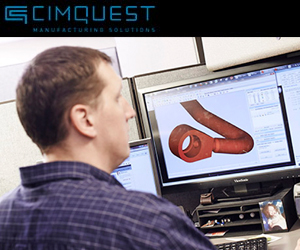
3D Printed Prosthetic Hands w. e-Nable
Let’s take a look at how 3D printing is being used to produce fully functional prosthetic hands for children in need. Brent Chanin from a company called Mediprint, reached out to Cimquest to let us know about a not for profit company who aims at equipping disabled children with 3D printed prosthetic hands. He asked if Cimquest would be interested in participating in their program and naturally, our answer was a resounding yes! You may have heard of E-Nable. It is an organization dedicated to matching children in need with the 3D printing community and its ability to produce almost anything. Using specially designed parts, anyone can download the necessary CAD files and print the components for a "robo hand.” From there E-Nable will match your hand up with a recipient. Through our participation, Cimquest offered to print hands for E-Nable using some of our Stratasys Dimension FDM 3D Printers. All of the hands were printed in Durable ABS plastic using a soluble support, which was subsequently removed in an automated procedure in a cleaning station. From there the parts were ready to go and looking great. When all is said and done, we were able to turn over a total of 25 [...]

Lead Time Reductions with Stratasys Additive Manufacturing
Germany-based, Hamburg Ship Model Basin (HSVA), has significantly reduced the time and cost to produce bespoke prototype ship model components since introducing Stratasys additive manufacturing technology. Having previously outsourced its 3D printing requirements, HSVA realized that further time-savings and cost reductions could be achieved by bringing the technology in-house. Following the installation of the Objet Eden350V, the company has been able to quickly and cost-effectively produce strong, high performance plastic prototype parts while upholding its high standards of quality and precision. Meeting the challenge to produce 100% true-to-scale prototype models "A full-size ship is a complex geometric form with many complicated shapes that have to be re-produced true-to-scale," explains Michael Neumeier, Mechanical Design Engineer at HSVA. "To traditionally manufacture a prototype ship rudder in wood or plastic is a very skilled and labor-intensive job and typically takes up to three weeks to produce. With our Stratasys 3D Printer, we can produce parts within a day, which after cleaning, are ready for final assembly." This extraordinarily short production time combined with minimal set up grants HSVA far more flexibility in dealing with customer requests - including the implementation of last minute changes. According to Neumeier, HSVA is also reaping the benefits of 3D printing [...]
Top Factors that Affect 3D Printing Price
We often receive questions regarding 3D printing. Most often people want to know what determines the price of 3D printing services? Part size and geometry understandably affect price, but there are other details that can alter the price of your parts. The following factors will impact the price of printing your 3D part. Material We charge based on the amount of material that’s needed to build your part and what material you choose. Material cost is associated with the mechanical properties as well as ease and speed of manufacturing. If you’re looking for the most cost effective material, a simple prototyping photopolymer would probably be the best option; if you have more functional requirements, you may need a higher strength material which could be more expensive. The amount of support material on your design can also affect the price. Optimizing your design with self-supporting angles (usually around 45 degrees or more) uses less support material and can help reduce material expenses. Layer Height Layer height is the measure of each layer of a 3D printed part. Depending on the technology, a thinner layer height can reduce visible “stair-stepping” or the inherent ridges on the surface of 3D printed parts and improve the surface [...]