Today’s blog post will show you how easy it is to produce high-quality metal 3D prints on your desktop FDM printer. We’ll be looking at a revolutionary metal filament from BASF, which comes in both 316L and 17-4 stainless steel in 1.75mm and 2.85mm filament widths. We will discuss some design considerations for printing with metal and the process of turning your green parts into fully sintered metal prints.
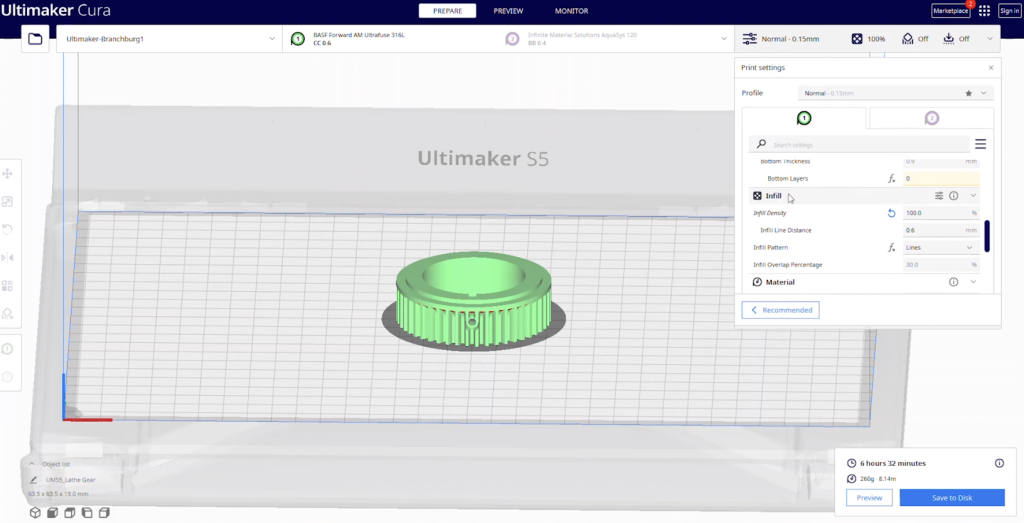
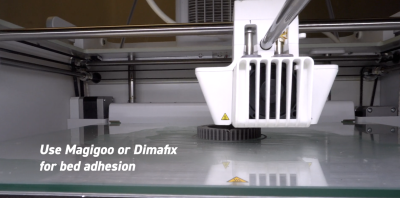
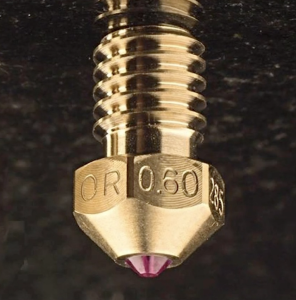 Cura is a free FDM slicing software that is compatible with a wide range of FDM 3D printers. In our example, we used an Ultimaker S5 with a 0.6mm ruby Olsen nozzle. Steel filaments are naturally abrasive, so while you can use the brass nozzle that comes standard with your printer, it’s best to use a hardened steel or ruby-tipped nozzle.
Some basic parameters that you should consider
- For the best part strength, consider printing your parts with 100% infill. If your parts need to be lightweight, consider using 50% infill with a grid or gyroid pattern.
- The most important factor for print success is the part geometry. When designing your parts for metal 3D printing, keep simplicity in mind.
- Try to keep overhangs below 45 degrees to minimize the need for support.
- Avoid models with sharp corners and large aspect ratios, opting for fillets where possible to reduce the risk of splitting during the sinter process.
- The minimum wall thickness for metal prints is ⅛ inch or about 3mm. If the wall is thinner than this, it may collapse during sintering; think of a piece of paper versus cardboard and how it crumples when pressure is applied to it.
- Make sure that your parts have at least one flat edge to be placed on during sintering. If the bottom surface is warped, as the metal sinters and flattens, it may lead to stress cracks. Since the material is pliable in its green state, you can lap the bottom surface with sandpaper to ensure that you have a solid bottom surface.
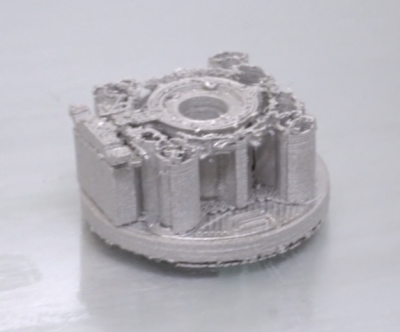
Depending on your printer and slicer settings, small gaps and abrupt start/stop moves may pose a challenge for this material. In this example, when trying to print with thin support structures, the material balled up on the end of the nozzle and caused a jam.
This material works best when your layers print in long continuous moves like this solid model of a lathe gear.
Lastly, when all the parts are printed and ready to go, reach out to a company that provides sintering services. For us, we recommend DSH Technologies as they are certified to work with BASF metal 3D prints. Simply buy a sintering ticket from their website, fill out the form that shows the weight and infill, and send it off to be sintered! In less than a week, you will receive your fully sintered metal 3D prints!
As you can see, this filament is unique because it requires no changes to your workflow or machine setup. Just feed the filament in and you’re ready to go. It’s never been easier to get high-quality metal 3D prints from your desktop machine. For more information on UltiMaker 3D printers click below.


Leave A Comment