Reverse Engineering Back to Native CAD
Reverse Engineering Back to Native CAD In this webinar on demand we demonstrate Design X and how it differs from Wrap for reverse engineering. Whether your need is to convert physical parts into fully editable CAD models, or to use models for FEA/toolpath generation, this Webinar will guide you through the process and how it works. https://cimquesttv.wistia.com/medias/m9ebrivpts?embedType=async&videoFoam=true&videoWidth=640
3D Printing for Dental Equipment Development
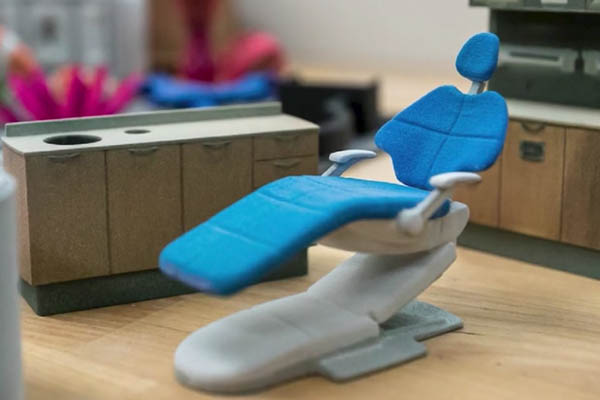
A-dec is an Oregon-based manufacturer of dental equipment, including specialty chairs, delivery systems, medical lightning, and supplies. They are always looking to improve the ergonomics of designs since better ergonomics results in better care and experience for patients. A-dec was no stranger to 3D printing. They first adopted traditional 3D printers a decade ago, to assist in product development. However, due to limits on speed, strength, and detail, they were forced to outsource many of their prototypes. When they adopted HP’s full-color solution, they first used it for prototypes and quickly expanded to jigs, fixtures, and assembly aids. They were impressed with the improved surface quality, mechanical properties, and speed. But another important characteristic was the geometric tolerances, allowing assemblies to fit together accurately. Initially intended for only prototypes and tools, engineers began to see the machine’s potential for end-use parts. They started to make replacement parts for their subtractive machines. On older subtractive machines, replacement parts may not be available from the OEM, which requires costly outsourcing. This was also the case for a customer’s dental machine. The customer needed a replacement part for a 20-year-old dental unit. Previously made by vacuum forming, the tool to create this part had been destroyed [...]
Verisurf Reporting Tool
Verisurf Reporting Tool - On Demand Webinar Watch this on-demand replay as we continue to dive into the use of the Reporting Tool in Verisurf. We will measure multiple features by using the MEASURE Module, calculate the ‘Form’ for each ‘live’ feature, and finally how to export them to the Report Writer. Following that we will progress by measuring distances, angles, hole sizes and GD&T call-outs. Be a shop leader or impress a manager as we teach you how to craft and produce eloquently formatted reports. https://cimquesttv.wistia.com/medias/gvoqc228xe?embedType=async&videoFoam=true&videoWidth=640
3D Printed Face Shields for COVID-19
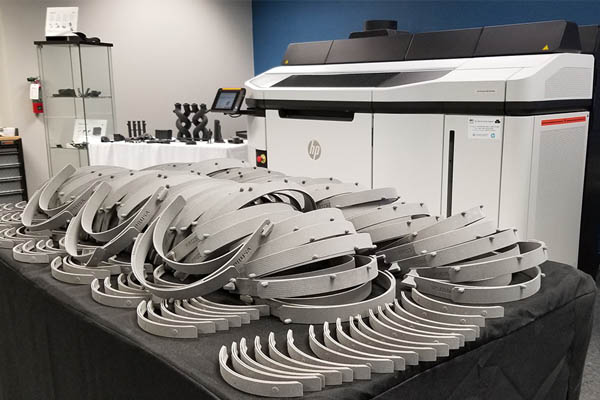
We just recently finished another 3D printing project here at Cimquest that helped out our local medical community amid the COVID-19 crisis. This time we printed and assembled 94 face shields that we donated to Morristown Medical Center in Morristown, NJ. Jimmy Barrera purchased the plastic face shields, Cimquest printed the headband portion that holds the shields. Those headbands were designed by Avid Product Development specifically for the HP 4200/5200 MJF printers. We printed them in our HP 5200 MJF 3D printer out of PA12 (Nylon12) at our headquarters in Branchburg, NJ. Once all the headbands were printed, Jimmy and his wife assembled the face shields at home and hand-delivered them to Morristown Medical Center where his sister works as an RN. In Jimmy's words: "What an experience! There truly is no greater joy than giving!" Cimquest has printed 400 more headbands since and we are making plans to assemble and donate them to other hospitals and clinics that are still in dire need of these.
Mastercam Intro to 2-Axis Lathe
Mastercam Intro to 2-Axis Lathe Watch this on-demand replay of Mastercam 30-minute webinar that was live on May 5th. During this webinar the general interface as well as geometry types and preparation are demonstrated. Machine and tool loading, basic tool-paths, refined tool-paths, and similar part programming are also explored. After the Q&A portion there is a preview of part II where will be talking about Live Tooling. https://cimquesttv.wistia.com/medias/tqmd0osgei?embedType=async&videoFoam=true&videoWidth=640
Mastercam Programming Multiple Parts in Assembly file
Mastercam Programming Multiple Parts in an Assembly file Watch this on-demand replay of Mastercam 30-minute webinar that was live on May 1st which demonstrates Mastercam programming multiple parts in Assembly files and answers your questions. https://cimquesttv.wistia.com/medias/kyavnptmxg?embedType=async&videoFoam=true&videoWidth=640