In previous Mastercam posts, we explored the first and second of three Mastercam 2024 b-Axis Contour Turning enhancements. You can find the first post here and the second one here. Today we are going to move on and talk about the last one – the Adjust Stock function.
Many turning operations in Mastercam include the Adjust Stock function. B-Axis Contour Turning operations now also include this feature. However, the interface has been completely redesigned for an easier workflow.
Click Adjust stock to edit the stock model at the beginning and end of the toolpaths. Do this to control how the tool enters and exits the stock.
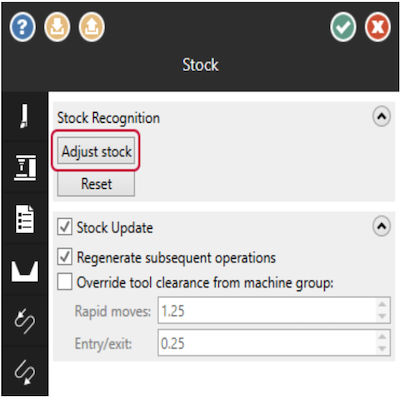
When you click the button, Mastercam displays the existing remaining stock model relative to the chained geometry in a temporary viewsheet. A green ball indicated the beginning of the chain, and a red ball indicates the end. The gray dashed line indicated the current stock boundary.
Click and release one of the balls to edit the stock model at either end of the chain. Drag the ball to the desired location on the stock boundary, and then press Enter.
White dots indicate up to three locations to which the cursor will snap:
- The location perpendicular to the direction of the cut.
- The location parallel to the direction of the cut.
- The location parallel to the direction of the chain.
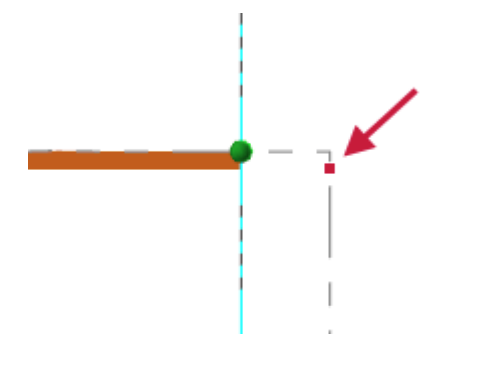
In these pictures, the white dots are displayed in red for the sake of clarity. For example, you can drag the ball to the stock margin to extend the stock to the face of the part or drag it down to create a chamfer.
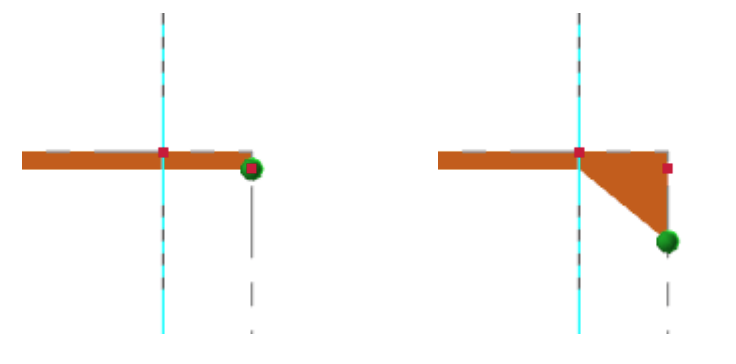
When you are done, click Enter to return to the function panel. Click Reset to undo the changes and restore the original stock.
Fill out the form below to receive Mastercam news and tips like this one directly to your inbox twice per month.


Leave A Comment