Since as early as SolidWorks 2000, SolidWorks has had the Hole Wizard tool to quickly help you create a hole on your part with a predefined cross-section, based on the standard and sizes that you chose, but now there is a new tool in SolidWorks 2017 called Advanced Holes.
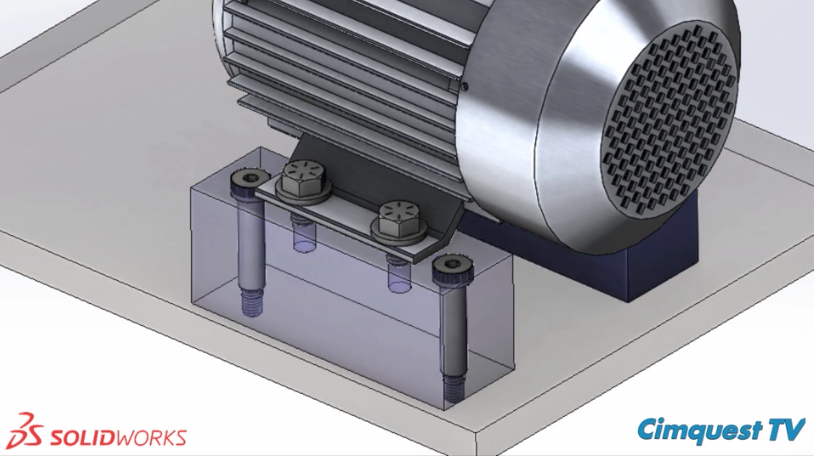
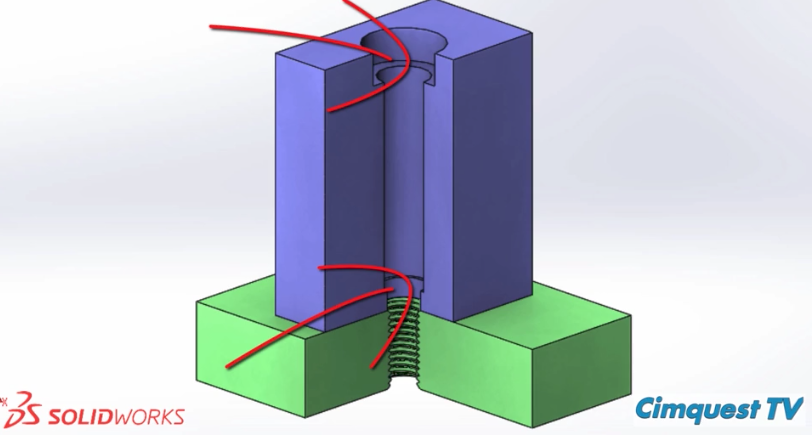
This is useful when the hole gets a little more involved, containing multi-sized cross-sections, like trying to create the holes for the shoulder bolts in the motor mount assembly shown above.
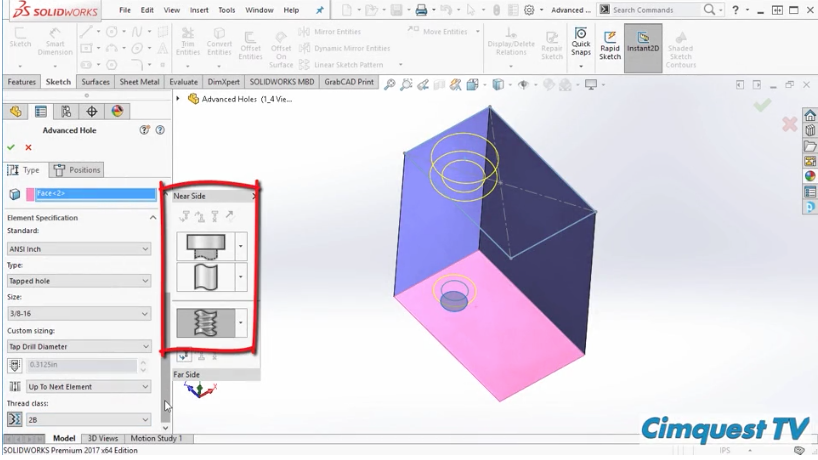
This tool allows you to define the near side and far side faces of the hole, with differing specifications.
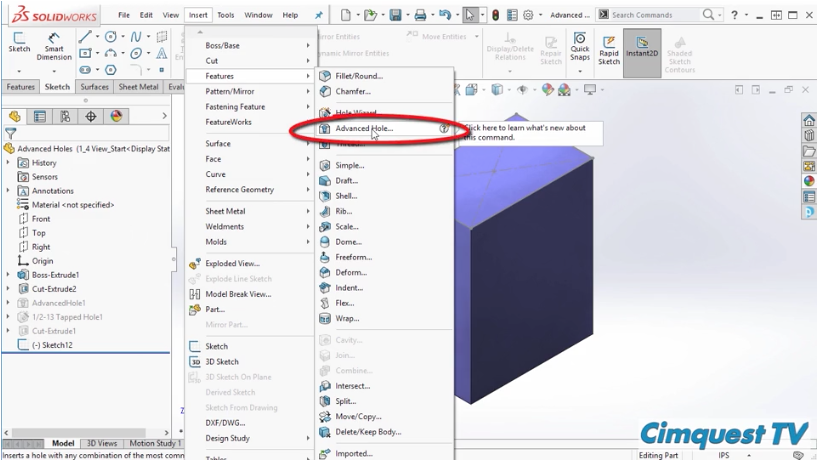
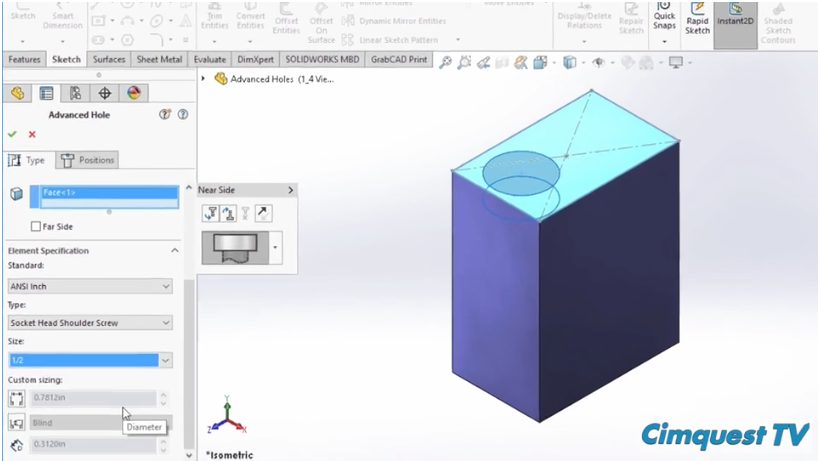
To use this tool, go to Insert > Feature > Advanced Hole.
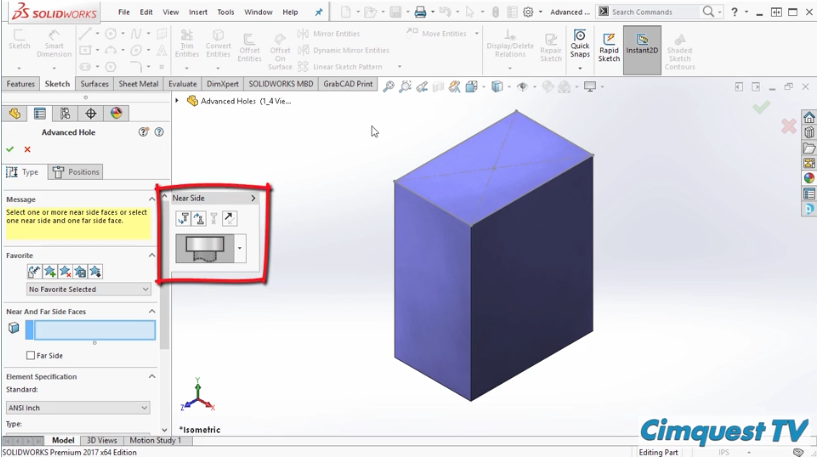
The property manager opens with the Near Side flyout displayed.
Select a face to start creating the advanced hole and you will notice that a temporary preview of the hole appears, based on your initial selections.
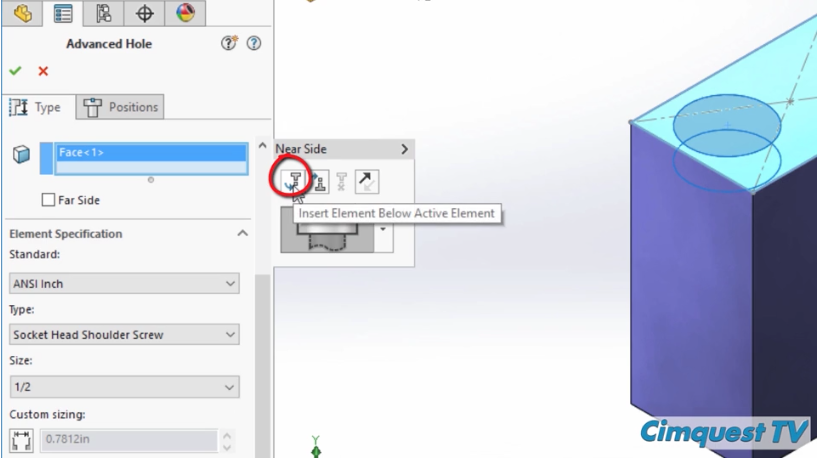
To add the next portion of the whole, click Insert Element Below Active Element.
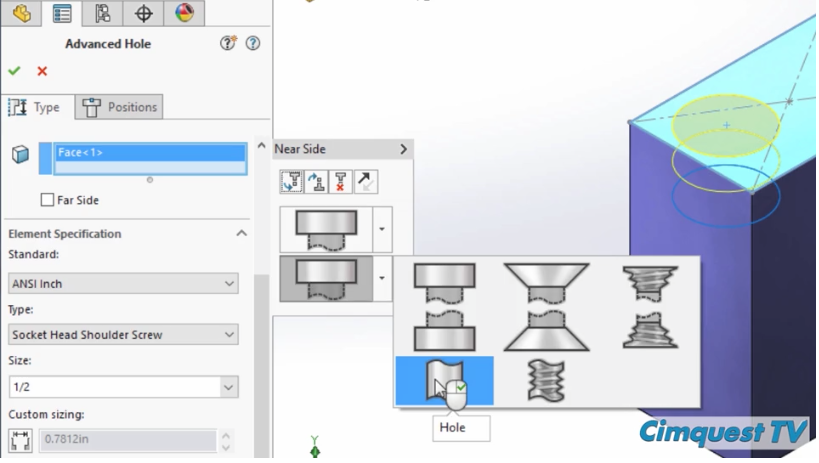
Here, you can use the pull-down arrow to define this element as a hole, then set your specifications for that as well.
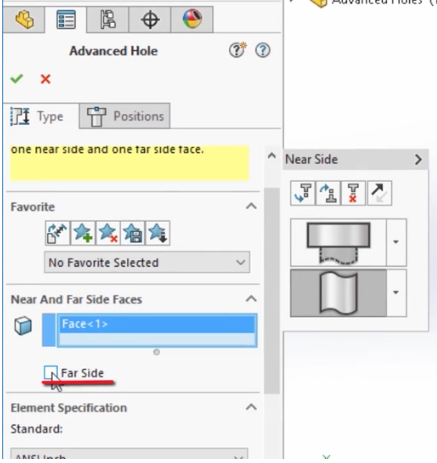
The last element will be a clearance hole for the threaded portion of the shoulder bolt. Just check the box Far Side and select the bottom of the block.
Next, set your specs for this and notice that Up to next element is automatically selected, which gives you a clean interface between all three sections.
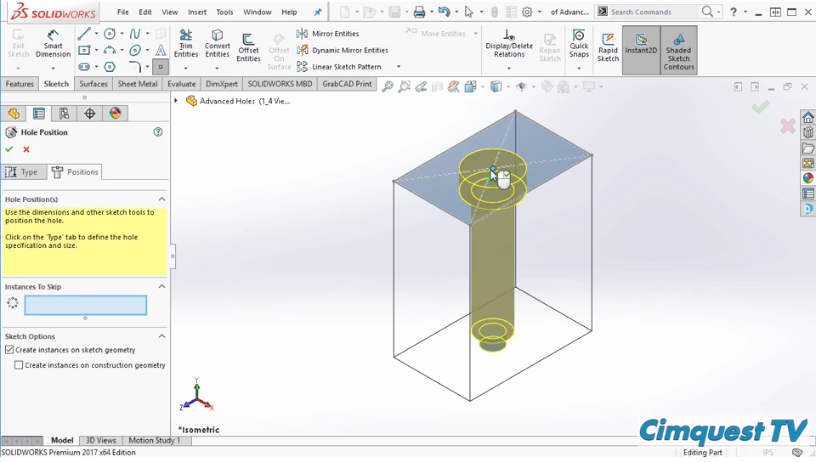
Before clicking OK, go to the Position Tab, and define the hole location. Click the green check mark and it’s done.
As you can see with the new Advanced Holes tool, SolidWorks 2017 is helping you create custom holes with varying cross-sections, all with a simple menu and few simple clicks.
Please be sure to sign up for our 2 Minute Tuesday video series to receive tips and tricks like this one in video form every week. More info at the button below.



Leave A Comment