Desktop Metal Secures Major Contract with U.S. Department of Veterans Affairs
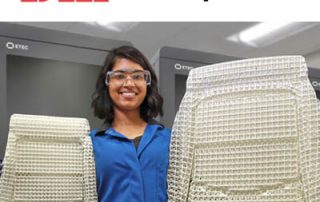
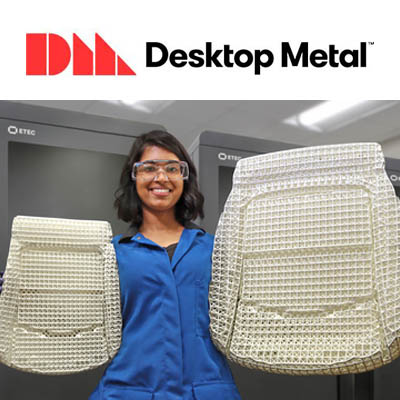
Desktop Metal recently announced a three-year, multimillion-dollar contract with the Veterans Health Administration to develop, test, and manufacture a variety of 3D printed healthcare products with a revolutionary new FreeFoam™ material. Under a contract with the Veterans Health Administration, Desktop Metal will develop, test, and manufacture a variety of 3D printed healthcare products with a revolutionary new FreeFoam™ material. Shown here, FreeFoam parts can be 3D printed at a fraction of their final desired size and expanded when ready for use, minimizing storage and warehouse needs and allowing for custom foam products. (Photo: Business Wire) FreeFoam is currently being printed exclusively on the ETEC Xtreme 8K top-down DLP printing system, with broad commercial availability slated for 2023. ETEC is Desktop Metal’s industrial polymer brand. The VA will receive an Xtreme 8K, as well as a variety of other equipment, in addition to development and design support for the project. The initial contract award, for $2 million, has the potential to grow to $7 million after successful phase-gate deliveries. “Desktop Metal is proud to partner with the Veterans Health Administration on this visionary project to advance health care, logistics, and decentralized manufacturing with our new 3D printing technology at production volumes,” said [...]
Desktop Metal Installs Over 1,100 Metal Additive Manufacturing Machines
Desktop Metal has installed over 1,100 metal Additive Manufacturing machines (Courtesy Desktop Metal) Desktop Metal, Boston, Massachusetts, USA, has announced that it has now installed over 1,100 Additive Manufacturing machines worldwide. Of the installed machines, more than 80% are reported to be for the Binder Jetting (BJT) process. “As the highest throughput process in 3D printing, Binder Jetting is the Additive Manufacturing technology that will truly take the industry into mass production at high volumes,” stated Ric Fulop, founder and CEO of Desktop Metal. “Our 3D printing systems are already being used to manufacture powertrain components, automotive interiors, oil and gas, food h equipment, hydraulics and some of the most advanced aerospace and nuclear parts.” The company’s portfolio includes: The Production System™ P-50 The X160Pro™, used in the production of both metal and ceramics The Production System™ P-1 The InnoventX™ The Shop System™ The Studio System™ An open house to showcase the performance capabilities of the Production System P-50 will be held next month. Manufacturers are invited to register today for this special event to see the performance capabilities of the Production System P-50 on-site at the Burlington, MA headquarters. Limited space is available. Date: Wednesday, January 25, 2023 Time: 10 [...]

2022 3D-Printed Ornament Design Challenge Winners
This holiday season marks our fourth annual 3D-printed ornament challenge and we are wrapping up the competition. We would like to congratulate the winners for their unique and creative designs. First place went to J-Da Toribio from the Wilkes-Barre Area Career & Technical Center for her Jack Skellington ornament. She won a $300 Amazon gift card to treat herself to something special just in time for the holidays. And the second-place prize went to Marcus Mitchell for his very cool Space Ball ornament. Marcus won a $100 amazon gift card! We will also be 3D-printing these ornaments and sending them to the winners so they will have a keepsake of their special designs for many years. Thanks to all who entered this year's contest. 1st Place, Jack Skellington ornament, J-Da Toribio, Wilkes-Barre Area Career & Technical Center. The final 3D-printed first-place ornament, ready to be mailed to the winner. 2nd Place, Space Ball, Marcus Mitchell. The final 3D-printed second-place ornament, ready to be mailed to the winner.

Metrology Minute – Comparison Point Analysis
The Comparison Point Analysis tool in Control X lets you to click on arbitrary point locations on the Reference (CAD) model and compare those to the same point, mapped to the Measured (mesh) model. This is a useful tool for identifying the accuracy of random point locations on the model. The typical method of mapping a point is using the “Along Normal” vector option, radiating from the selected point on the Ref model and projecting normal until the vector hits the Measured model. The length of the vector is the Deviation of that point location, from Reference to Measured. In this example, we select locations on the model. Let’s consider the water pump housing shown below. It is always advantageous to perform the Comparison Point function with a color map on the screen, comparing the mesh model to the nominal CAD model. You can see the color map and select critical point locations on the model for the analysis based on both critical part areas and color map display. By keeping the Comparison Direction set to “Along Normal”, the system will calculate the deviation from the selected point of the CAD model to the projected point on the mesh. And the tolerances may [...]

Software-As-A-Service (SAAS) Now Available for OQTON
OQTON Inc., formally 3D Systems, will be introducing a subscription-based, software license rental model to complement its perpetual license sales model. Starting in 2023, Geomagic Design X, Control X Professional and Geomagic for Solidworks’ customers will have the option of “renting” these products on an annual basis. The subscription model will ensure users a full year of software updates and bug fixes as well as technical support. The subscription model will be available to both new and existing, perpetual license users. SAAS enables customers to reap the benefits of powerful Geomagic reverse engineering and metrology software that might otherwise be financially out of reach. The annual subscription will provide a full year of these best-in-class products at roughly 1/3 the cost of a perpetual license. Shifting from a capital expense purchase to an operating expense, the annual “rental” offers higher flexibility at a lower entry cost and minimizes risk to the user. Through the new SAAS model, customers can predict and plan for their annual financial commitment to Geomagic products while an upgrade to the full, perpetual license will also be possible. Many of the top software companies in our industry have already adopted a SAAS model including; AutoDESK, Materialise, nTopology, PTC, Siemens, [...]
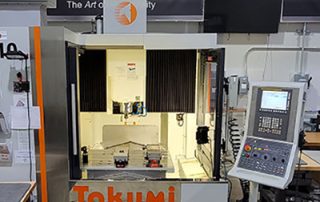
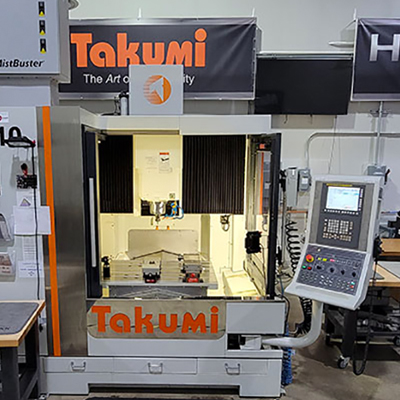
Used Takumi H10 CNC Milling Machine For Sale
It's been 5 years since we began our partnership with Hurco CNC and Alta Enterprises. We are extremely happy to continue that relationship by using and showing the great capabilities of their CNC Machines. We first received a Hurco VM 10Ui 5 -axis mill and a Takumi H10 VMC in Sept of 2017. The VM 10Ui has made its way to a new home running production parts and we now have the used Takumi H10 CNC milling machine available for sale for a great demo unit price. We need to move this amazingly accurate and rigid double-column mill out in order to get a new 5-axis Hurco in its place. Here are some specifications of the H10 and if you're interested, please contact Ray Dominguez at rayd@altamachinetools.com or 484-695-9435. The Takumi H10 CNC machine is a world-class machine built for die/mold, aerospace, and high-speed applications. Machine Specs: Control Info- FANUC© 31i-MB Series Control The Fanuc 31i control has 100 tool offsets and work offsets G53-G59 Travels- 40.16 x 27.56 x 19.69 in (1,020 x 700 x 500mm). Glass scales on all axis Table Size- 41.3 x 27.6 in / 1,050 x 700 mm Table Max. Load- 1,760 lbs / 800 kg Spindle Speed- [...]