Call Us Today! 1866.277.8778|sales@cimquest-inc.com

Inspection

2 05, 2023

Freescan Combo 3D Scanner – New Kid on the Block

By |2023-05-02T09:22:58-04:00May 2nd, 2023|Categories: 3D Scanning, Inspection|0 Comments

The Freescan Combo 3D Scanner is a multifunctional, hybrid light source, metrology-grade scanner. The tiny footprint makes scanning of tight quarters much more accessible than with traditional handheld scanners. By having four (4) working modes, the Combo is perhaps the most versatile, handheld scanner, on the market. In Laser mode, it offers multiple laser scanning options; multi-laser scanning (26 crossing lasers), single laser line scanning (for deep holes) fine line scanning (for very high resolution) and [...]

1 03, 2023

Analyzing Airfoil Shapes With Control X Airfoil Analysis

By |2023-03-01T08:54:35-05:00March 1st, 2023|Categories: Inspection|0 Comments

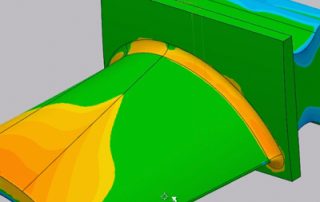
Today’s blog post will show you that analyzing airfoil shapes is easier than ever using the Geomagic Control X Airfoil Analysis technology. Once you complete an airfoil scan and align with the nominal CAD model, the software is able to return dozens of useful parameters. These parameters are necessary for a complete airfoil analysis and some of them include: Leading and trailing edge radii Leading and trailing edge positions in space Maximum chord height Leading [...]

3 03, 2021

Maximum Material Condition

By |2021-03-03T08:06:40-05:00March 3rd, 2021|Categories: 3D Scanning, Inspection|0 Comments

Why would one want to use a Maximum Material Condition for a true positional callout for clearance holes? Maximum Material Condition or MMC in GD&T is added to the GD&T symbol. The symbol is shown below. In this example, we have a .137 diameter clearance hole that is defined as .137 Rad +/-.010”. Let’s assume the hole is manufactured (drilled) and inspected and it comes out as a .1303 radius, placing it .0067 undersize. There [...]

4 02, 2021

Metrology Minute – Free Control X Viewer

By |2021-02-04T08:20:27-05:00February 4th, 2021|Categories: Inspection|0 Comments

The Free Control X Viewer sets new standards for inspection report review. While Control X has always been able to produce complete inspection reports in various static formats, the Control X 2020 Viewer goes beyond a static review of inspection criteria. When the Viewer opens an inspection, each of the Model Manager inspection objects is populated by the author of the inspection program, yet no menus are available for you to add new or remove [...]

9 12, 2020

Measuring Features on a Mesh Without a CAD Model

By |2020-12-09T08:13:32-05:00December 9th, 2020|Categories: 3D Scanning, 3d Scanning & Reverse Engineering, Inspection|0 Comments

While most inspection software will use a nominal CAD model during the inspection process for comparison of manufactured features to exact CAD features, Control X can perform a feature-by-feature analysis without utilizing a CAD model. This can come in very handy when a CAD model doesn’t exist for inspection and just a 2D drawing is used. The first step is to import just the mesh file or point cloud into Control X. As a reminder, [...]

24 07, 2020

Deviation Analysis in Design X

By |2020-07-24T08:40:30-04:00July 24th, 2020|Categories: 3D Scanning, 3d Scanning & Reverse Engineering, Inspection|0 Comments

Let’s take a look at the basics behind Deviation Analysis in Design X. This is an essential tool for reverse engineering and will ensure that you get the most out of your 3D scans. In Geomagic Design X, Deviation Analysis tells us how far off our derived CAD model is from our scan. There are typically three sources of error when scanning a part: There could be a slight error in the actual manufacturing of [...]

17 07, 2020

What PMI means to the future of integrated CAD/CAM

By |2020-07-17T08:20:04-04:00July 17th, 2020|Categories: Inspection|0 Comments

Since the mid-1980s, when PC based CAD/CAM started its explosion due to the advent of 386 computing technology, our industry has had an ongoing hurdle to overcome . . . How to convey manufacturing and inspection information with the original model design. Historically a manufacturer would provide a job shop with a CAD model and an inspection drawing, increasing the likelihood for inspection drawing interpretation error. Wouldn’t it be ideal if the manufacturing and inspection [...]

Go to Top