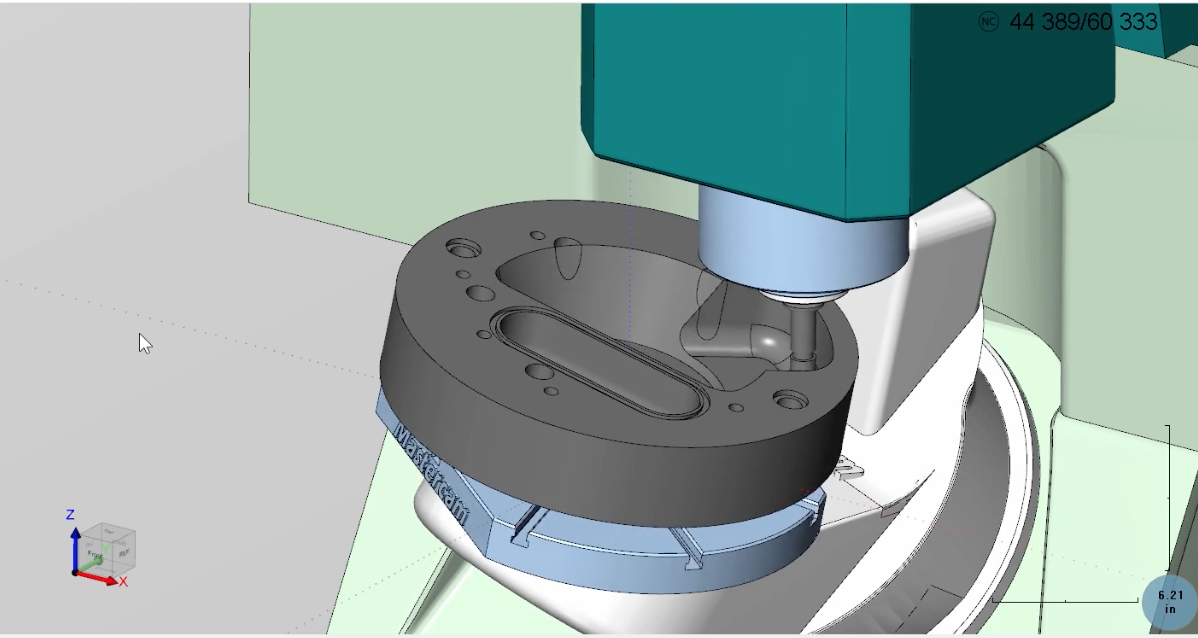
This article will explain how to use the edited tool holder to create a custom tool assembly in a Mastercam tool library. With the tool holders defined, we can take advantage of gouge check and tilt strategies in the surface and multi-axis toolpaths.
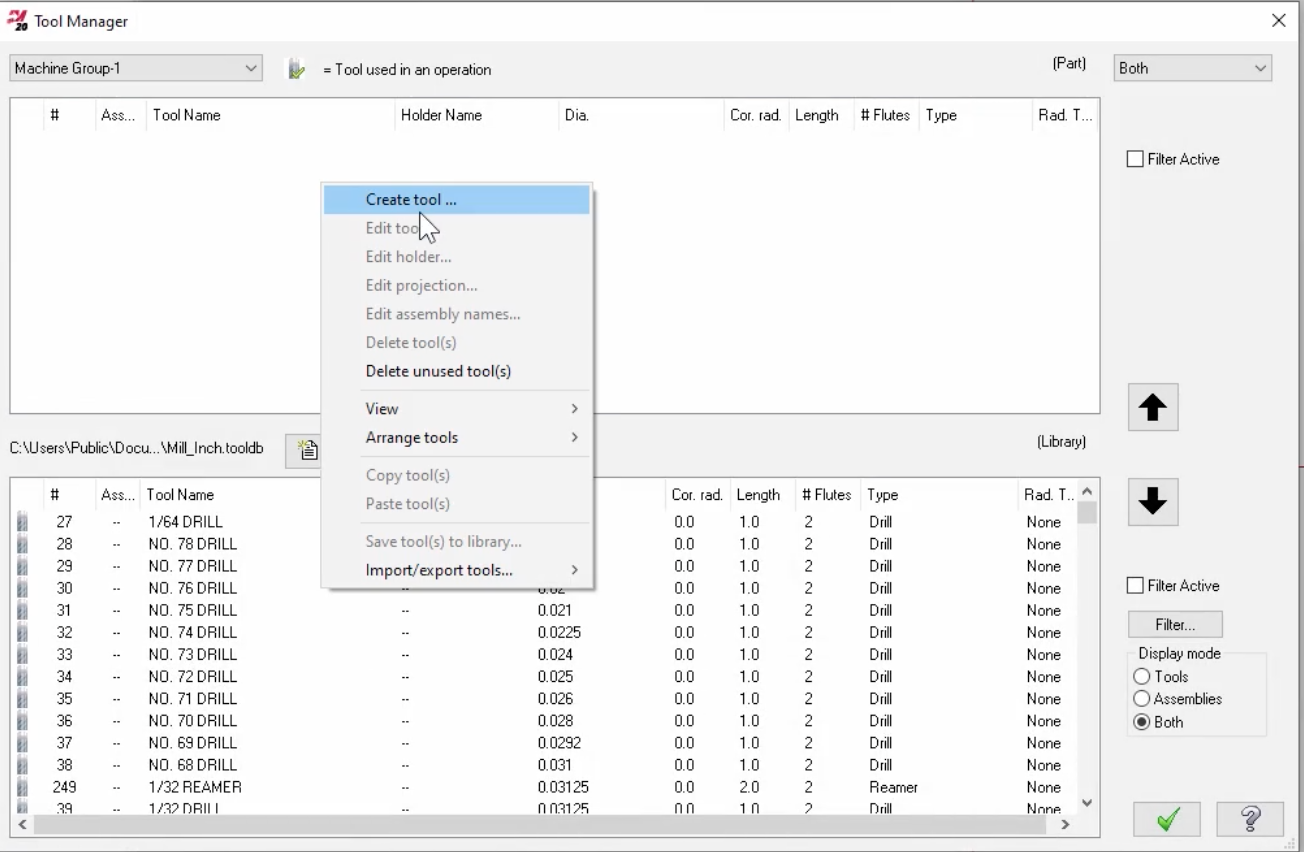
To create the tool assembly, we will use the Tool Manager in a Mastercam Mill part file. Open the Tool Manager and create a tool.

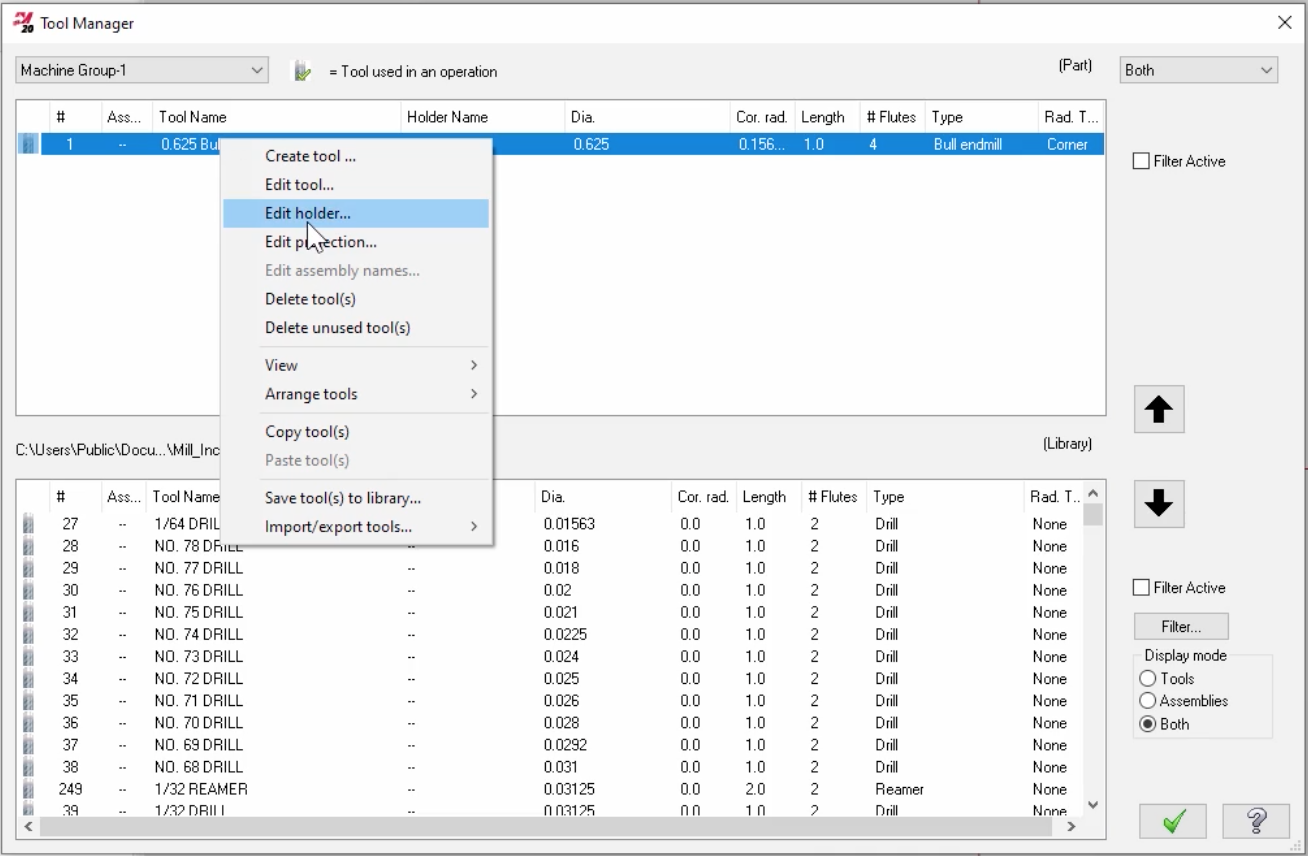
Next, right-click on the tool and select Edit Holder.
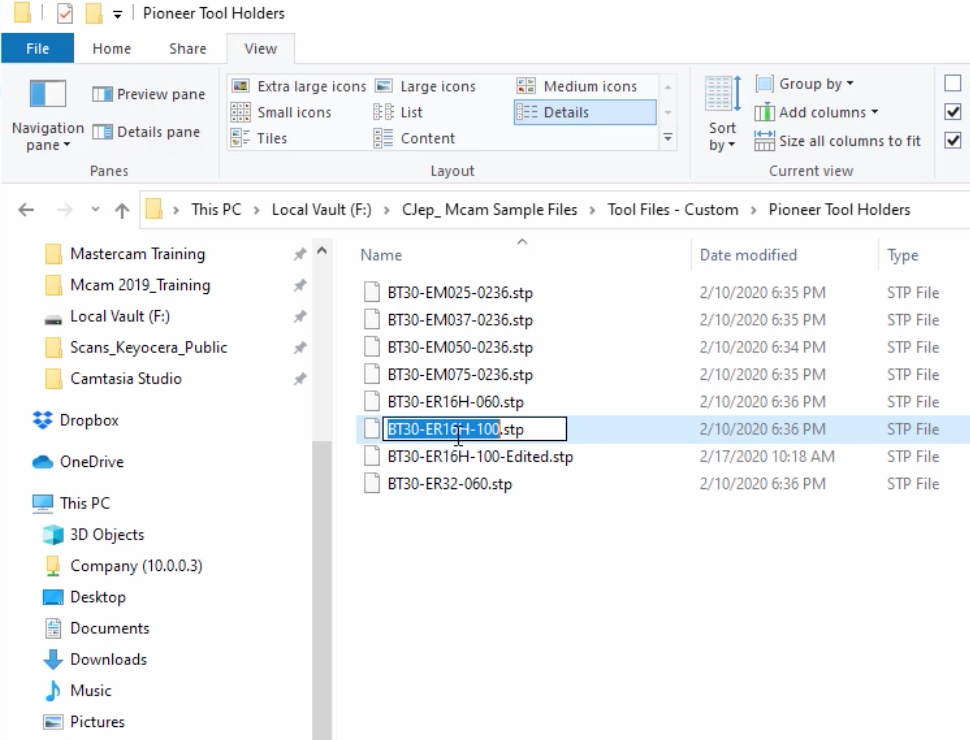
Now you can use the Import utility to open the edited STEP file. The holder name can be changed by copying the STEP file name. Use Control-C / Control-V to copy and paste, then use the drop-down menu to change the manufacturer’s name.
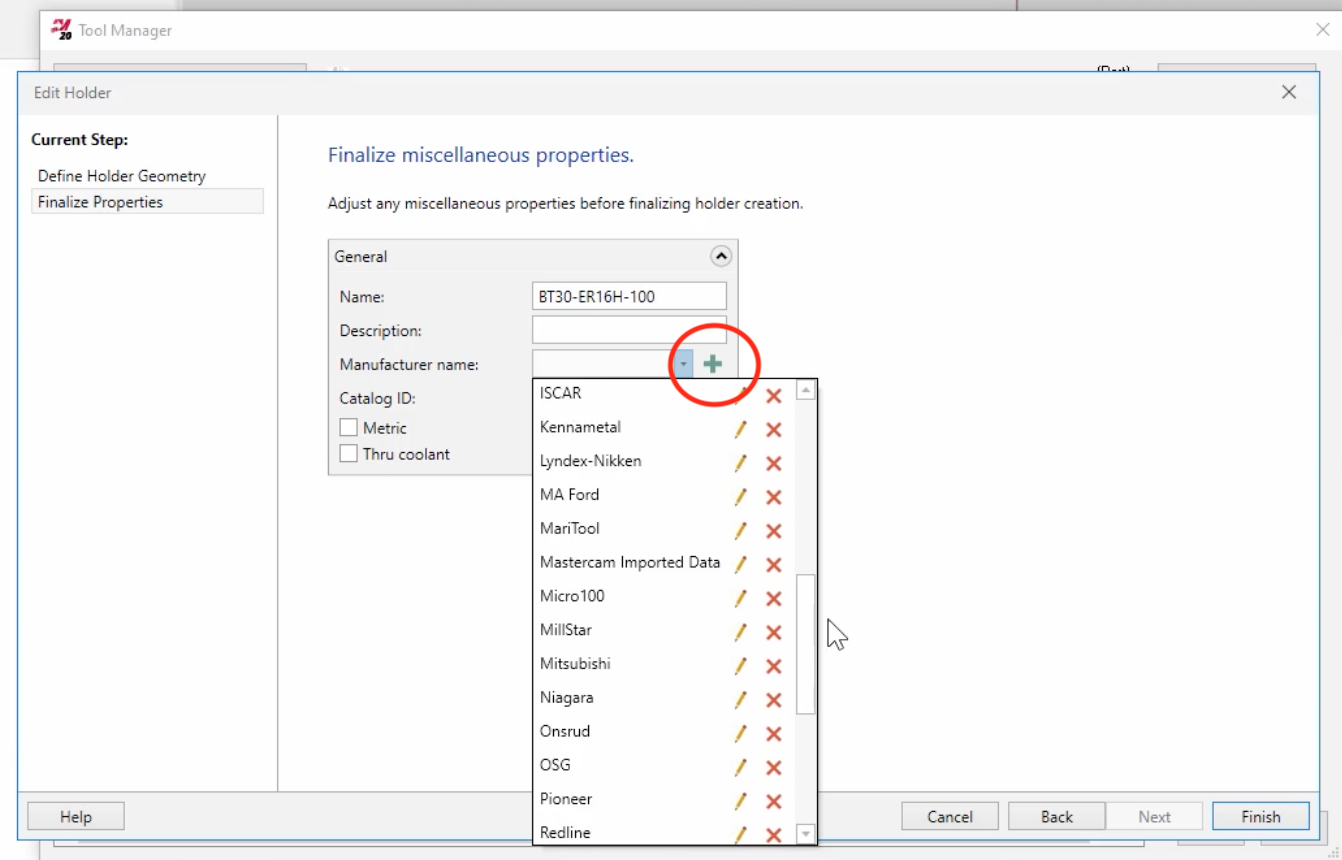
 If the manufacturer’s name is not in the list it can be added using the plus sign (+) on the right-hand side.
To check the assembly and set the tool stick out, right-click on the assembly and select Edit Projection.

You can change the stick out by selecting the holder and then moving it along the linear scale.

The tool assembly can now be saved to a custom tool library in the Tool Manager.
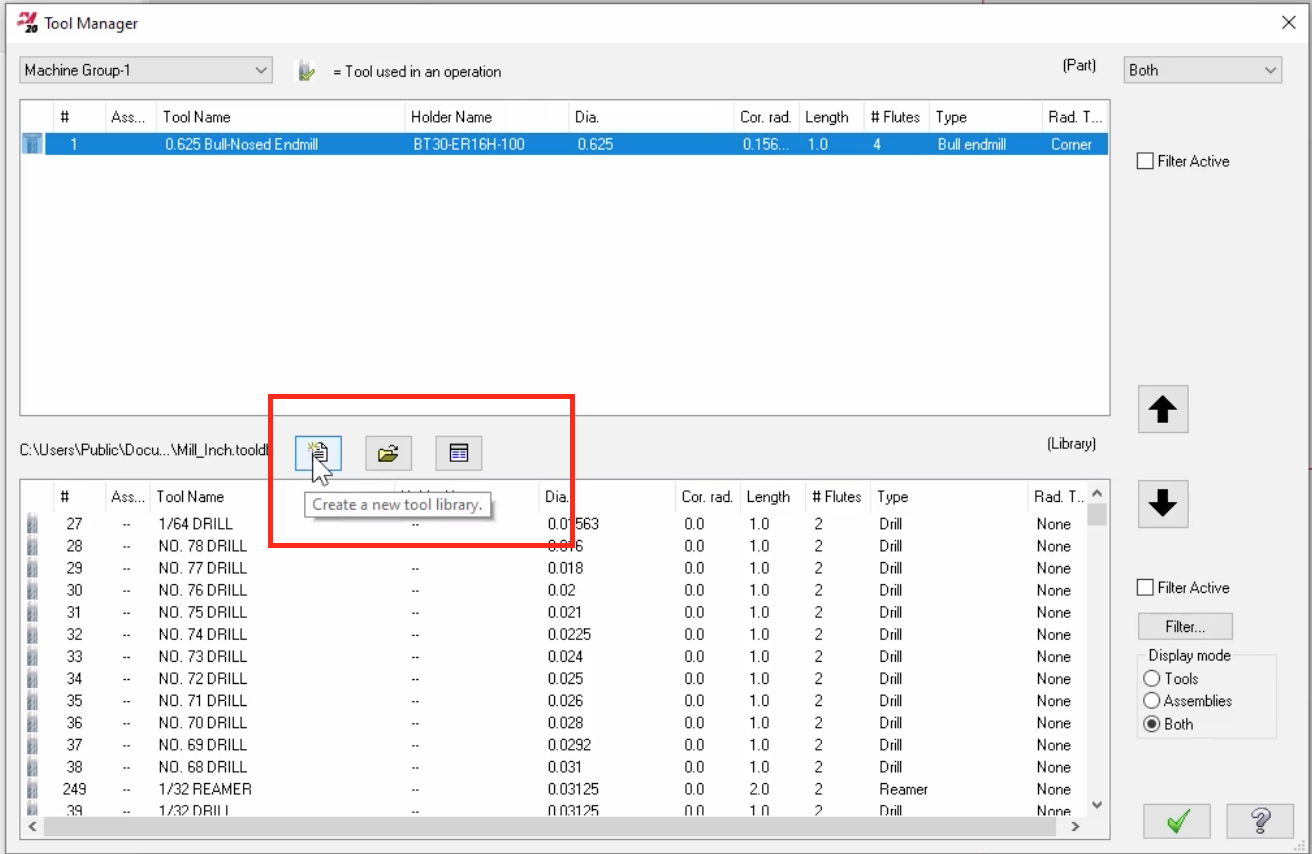
You can also choose to Create a New Library or Open an Existing Library. With the Custom Tool Library open, use the drop-down arrow on the right side of the Tool Manager to transfer the assembly into the library.

The new assembly can now be used in a Mastercam part file by loading the Custom Tool Library.
Please be sure to sign up for our 2 Minute Tuesday video series to receive tips and tricks like this one in video form every week. More info at the button below.

Leave A Comment