This article will show you how to adjust the coolant command options inside of the Machine Definition in Mastercam 2020. Setting up the names for the coolant is important to ensure that programmers and operators know exactly what style of coolant to expect for each tool.
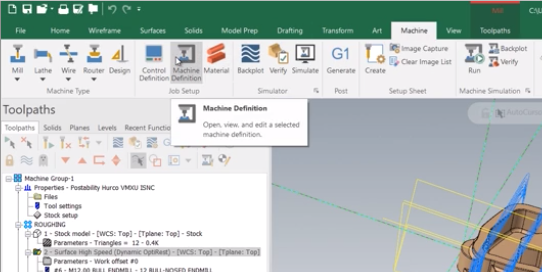
First, select the machine you would like to change and then go to the Machine tab on the Ribbon Bar and select the Machine Definition option.
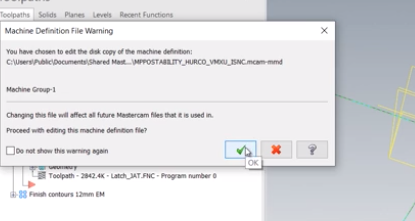
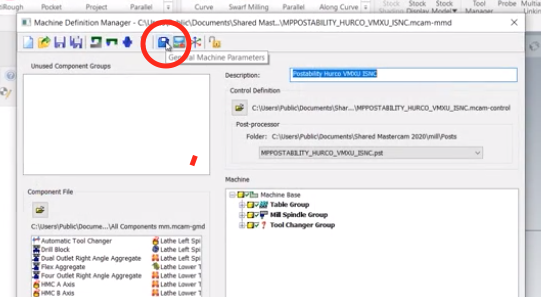
Click the checkmark in the box that appears and then click on the blue icon which will launch the General Machine Parameters window.
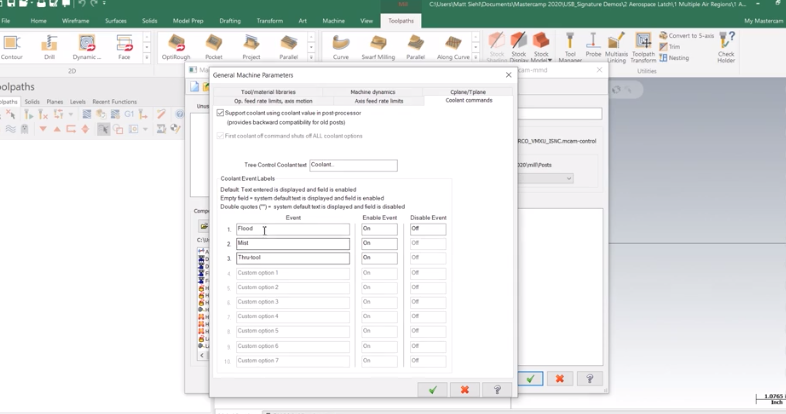
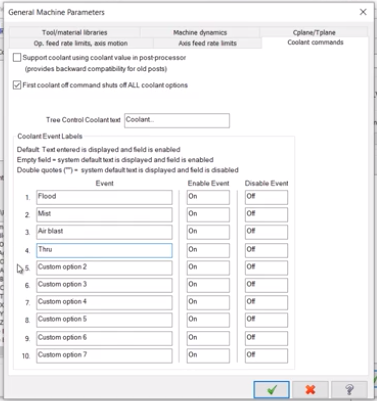
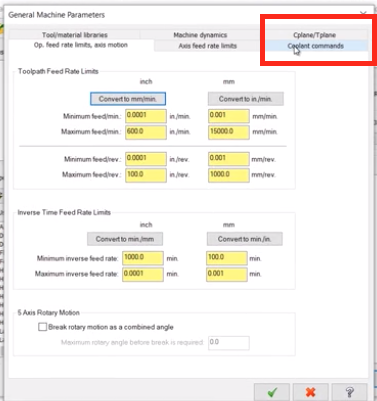
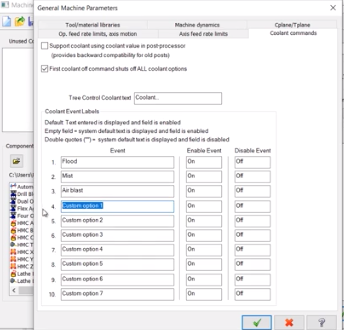
Inside here, click on the Coolant Commands tab.
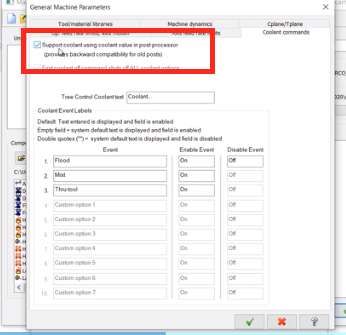
Now you will see the top checkbox that is enabled upon opening.
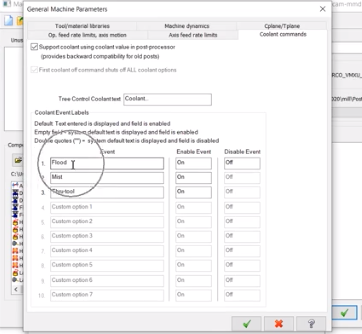
Because this option box is turned on, when you go to the coolant parameters in your toolpaths it will only display the coolant names that you set up. Also, there will only be an On and an Off switch.
If you turn that checkbox off, then you have the ability to add more coolant styles to the list.
This will also give you the option inside the toolpath when you want to turn these coolant options on in the toolpath, whether it is before the tool change occurs, with the tool change, or after the tool change but before cutting begins
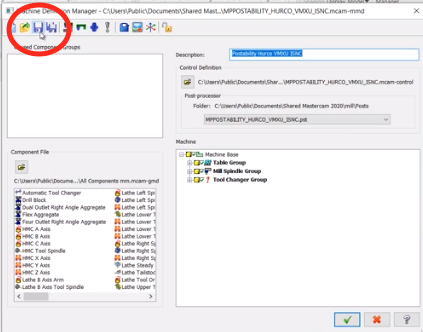
Finally, when you are done making the changes to your coolant commands, hit the checkbox to exit back to the Machine Definition Manager and hit the save icon at the top of the screen.
This ensures that all the changes you have made will be saved for future use. Now, close out of the machine definition window and hit yes to replace the machine definition with the one found in your shared documents.
As you can see, setting up the coolant names for the different styles you have available is fast and easy. Now instead of having a generic option name, you can have something a little more custom for your use.
Please be sure to sign up for our 2 Minute Tuesday video series to receive tips and tricks like this one in video form every week. More info at the button below.



Leave A Comment