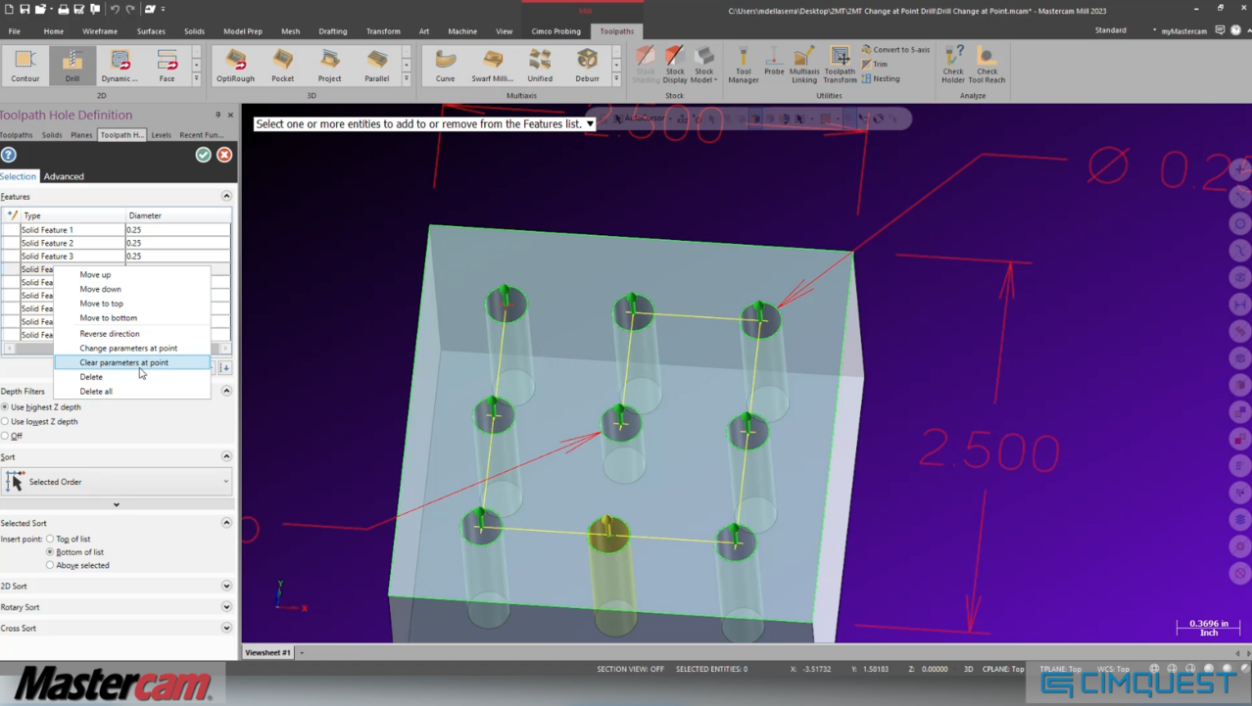
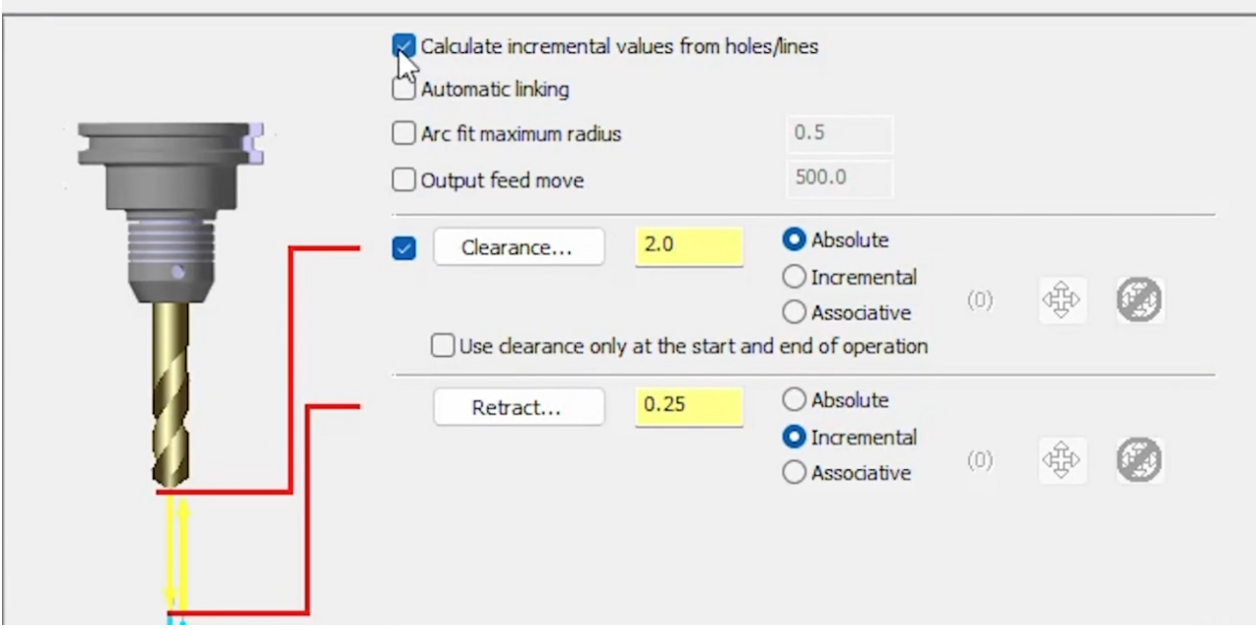
This blog post will explore how to use the Mastercam 2023 Drill toolpath. This new toolpath will allow you to edit toolpath motion for any single selected entity in that operation. Typically, when using Drill and working with a solid, you can use the Calculate incremental values from holes or line option.
This allows you to have multiple depths in a single operation. When you only have wireframe geometry this can be a little trickier to do. Using Change at Point, you can adjust how a single position will act in our toolpath.
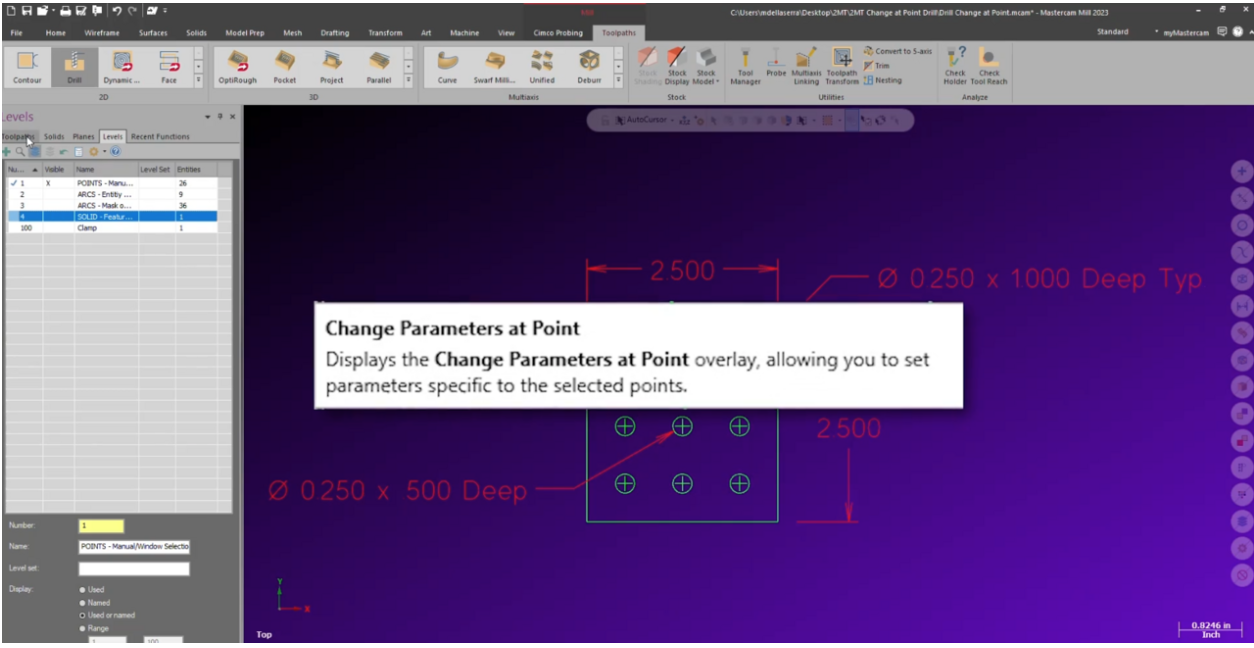

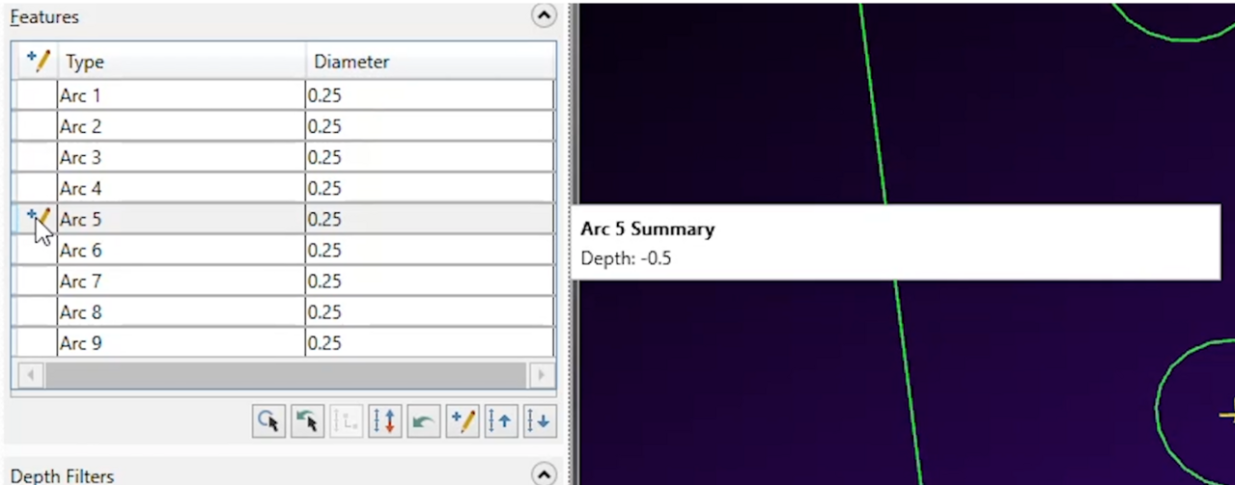
Let’s use this geometry above as an example. Notice the central hole is noted as being only .5” deep, while the rest are 1”. One option is to break up the geometry into two toolpaths. However, if you wanted to consolidate your toolpaths into a single operation you can using Change at Point.
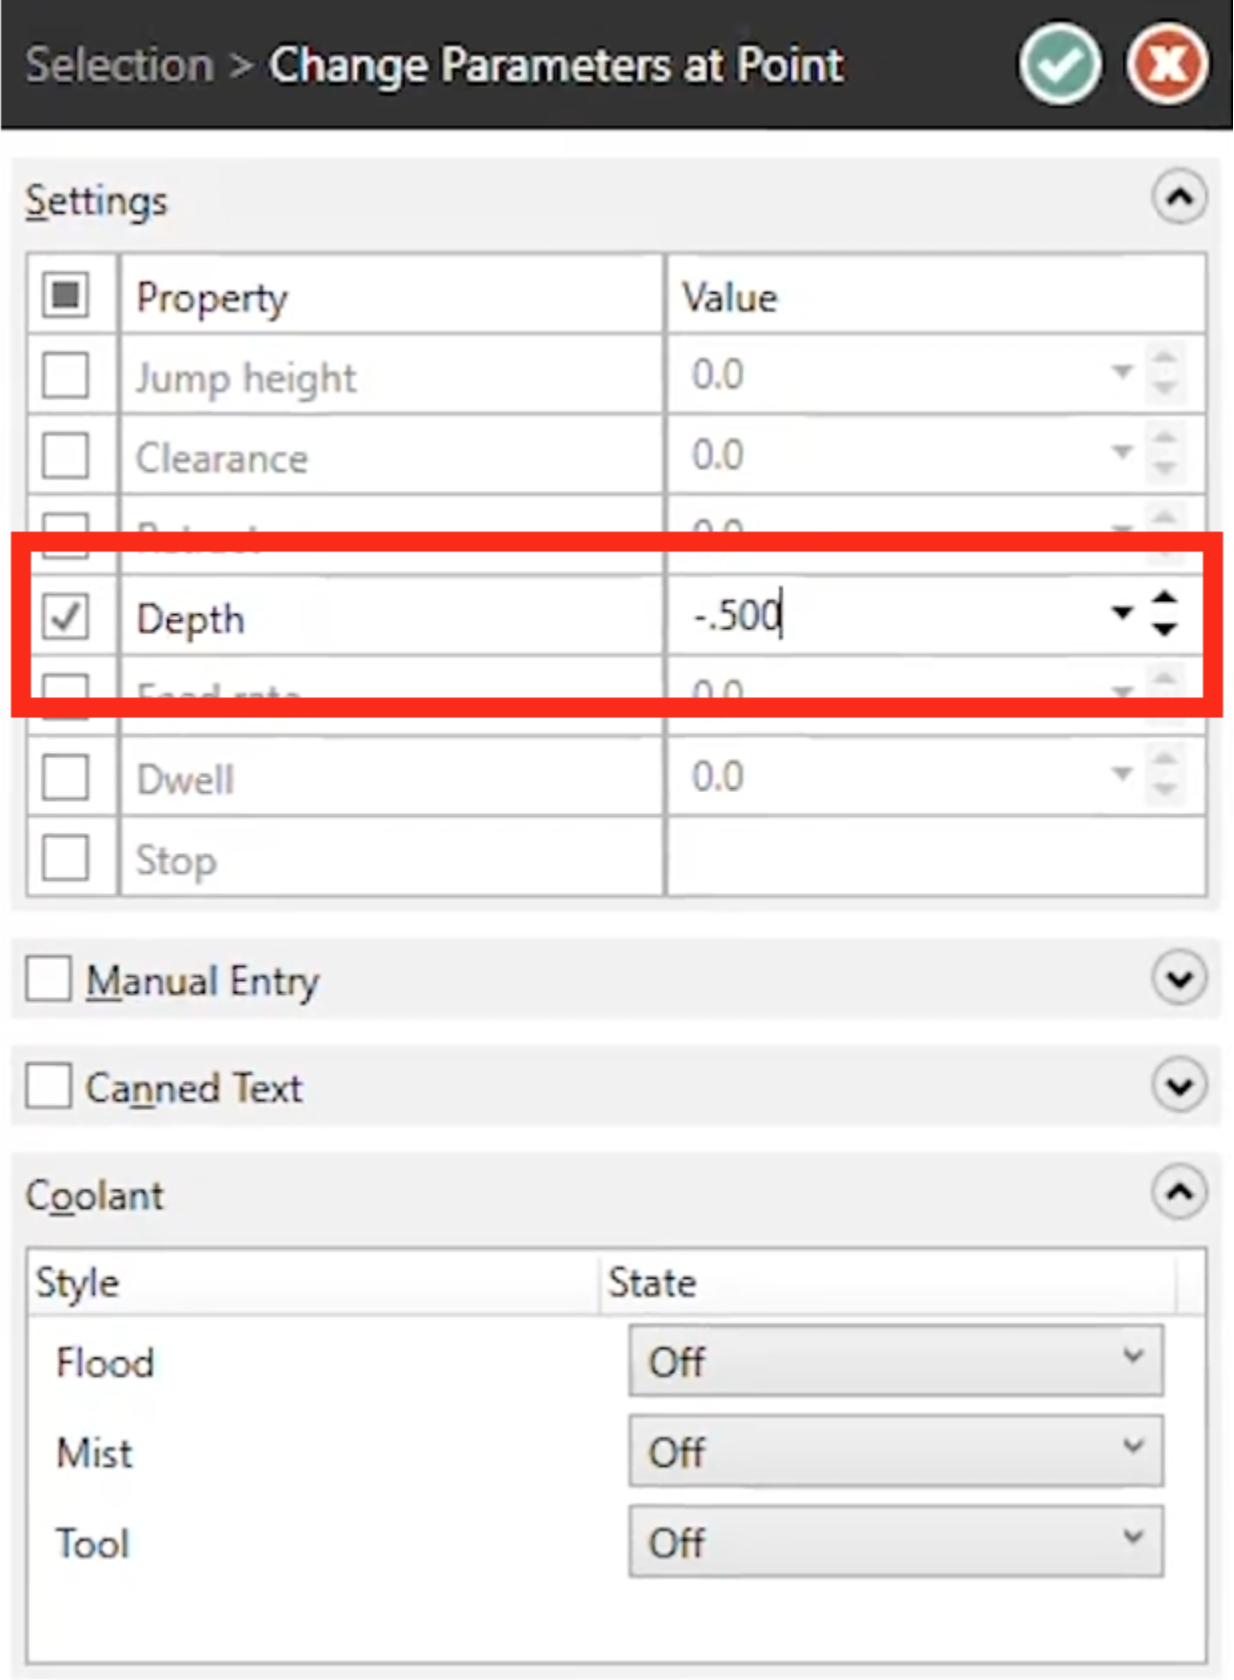
Once you select all the geometry, you can use Change at Point to edit your unique depth for the central hole. You can set the depth of cut to -.500”.
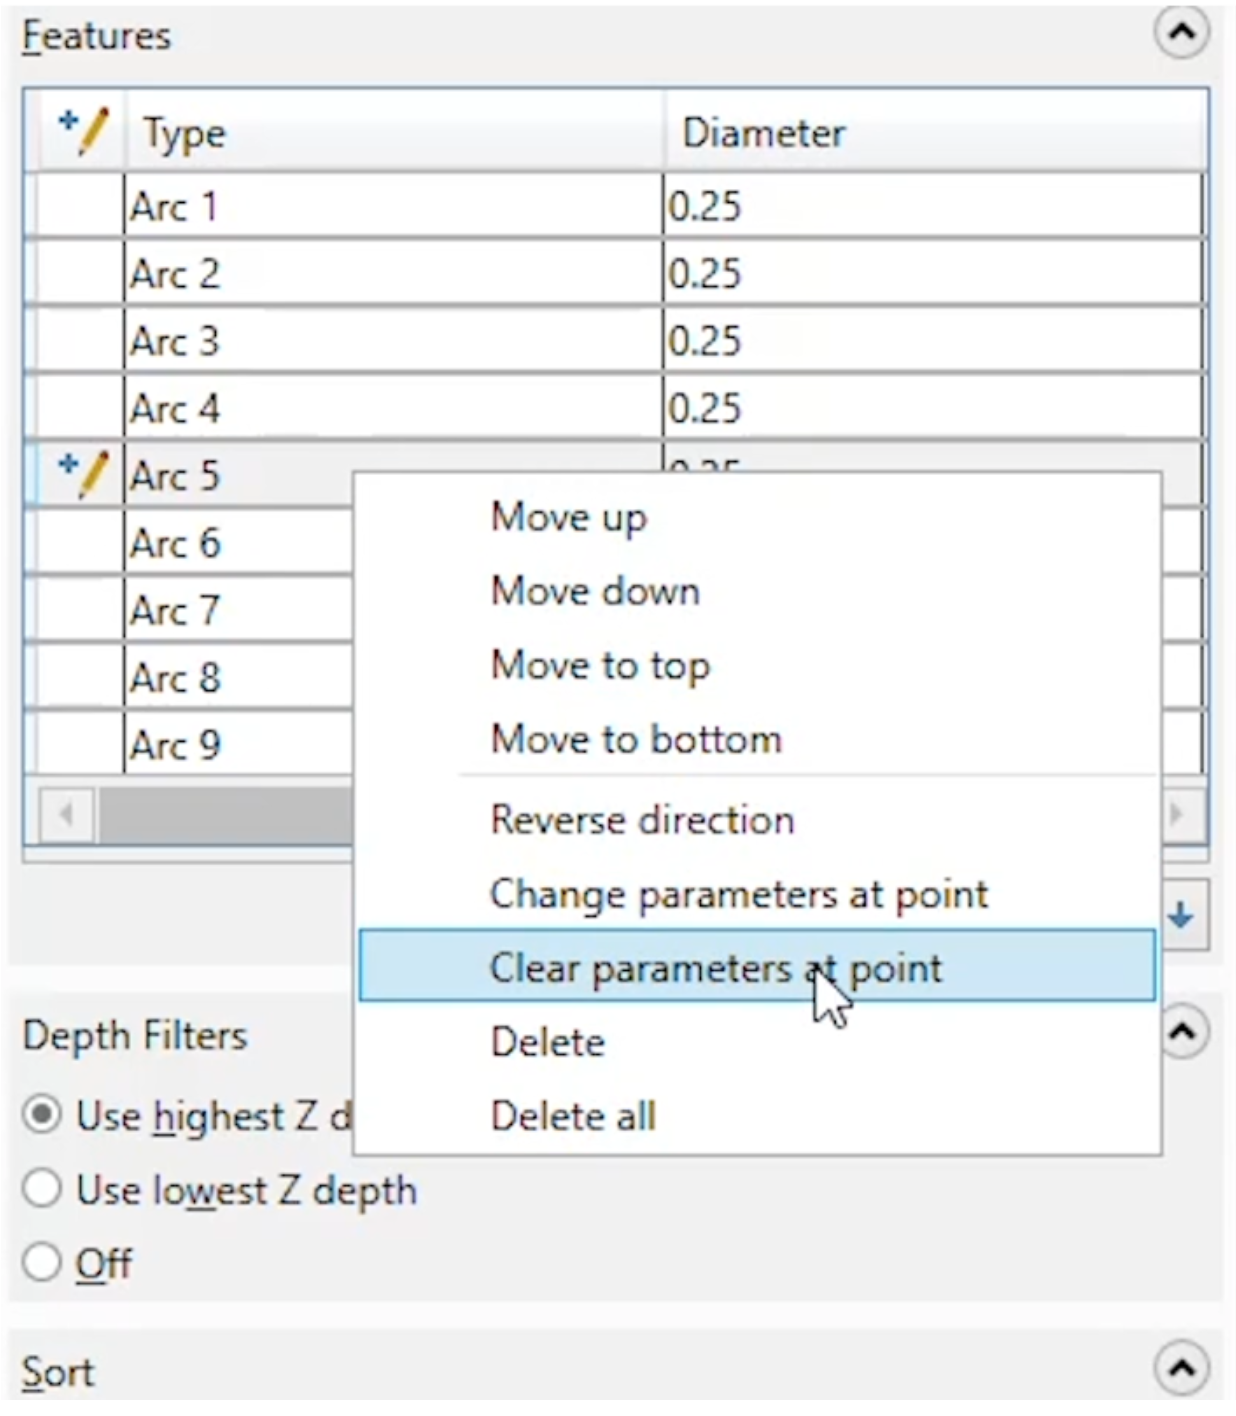
Once you apply any Change at Point parameters, you will see an icon added to that selection. This allows you to quickly identify that a custom parameter has been applied to that specific feature.
If you right-click on that feature you can also clear any added parameters.
This defined parameter will override the data you use in the toolpaths linking parameters. You will notice that you can change the depth, but the central hole keeps its depth.
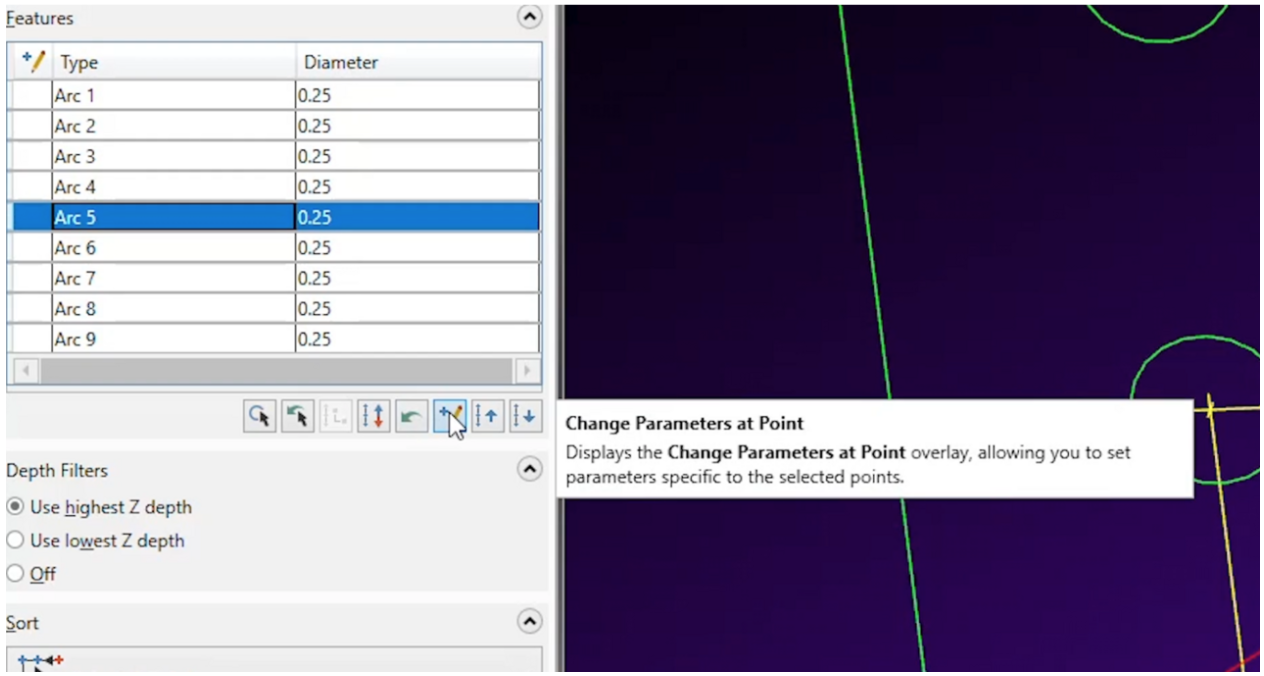
There are some other things you can do using Change at Point. One important thing to remember is that you can use this feature at the initial selection of your geometry, or through the geometry section for the operation.
Using Change at Point will allow you to edit not only the depth of a feature, but also change many other parameters for that given point.
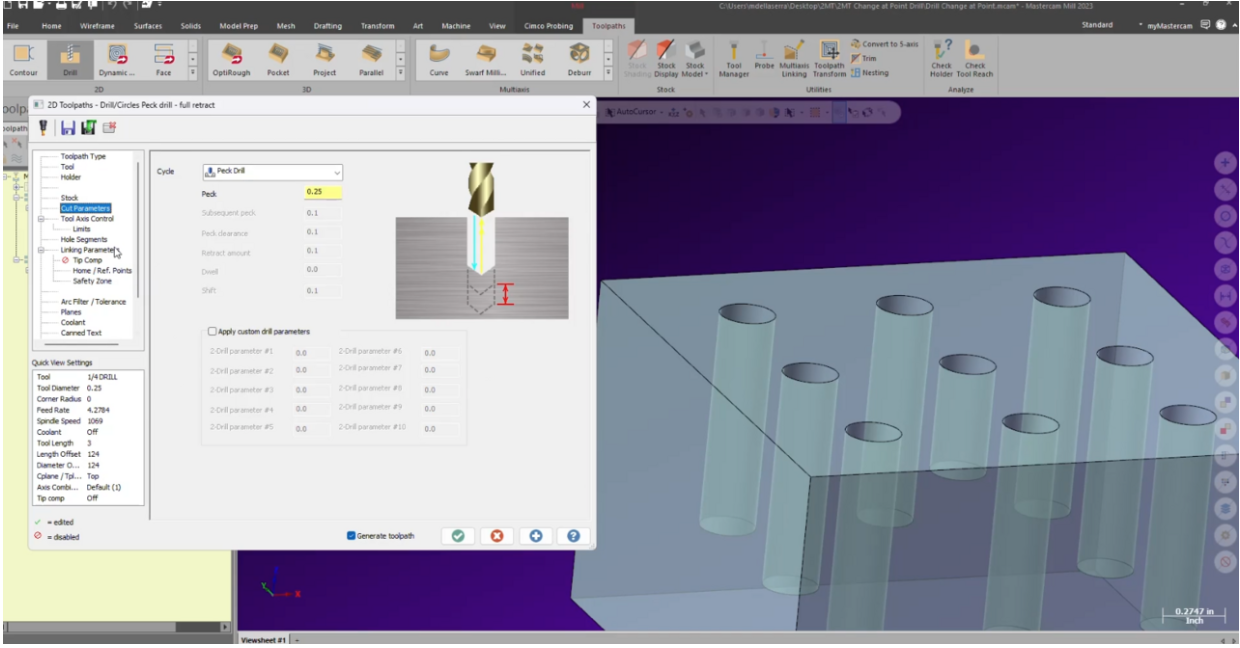
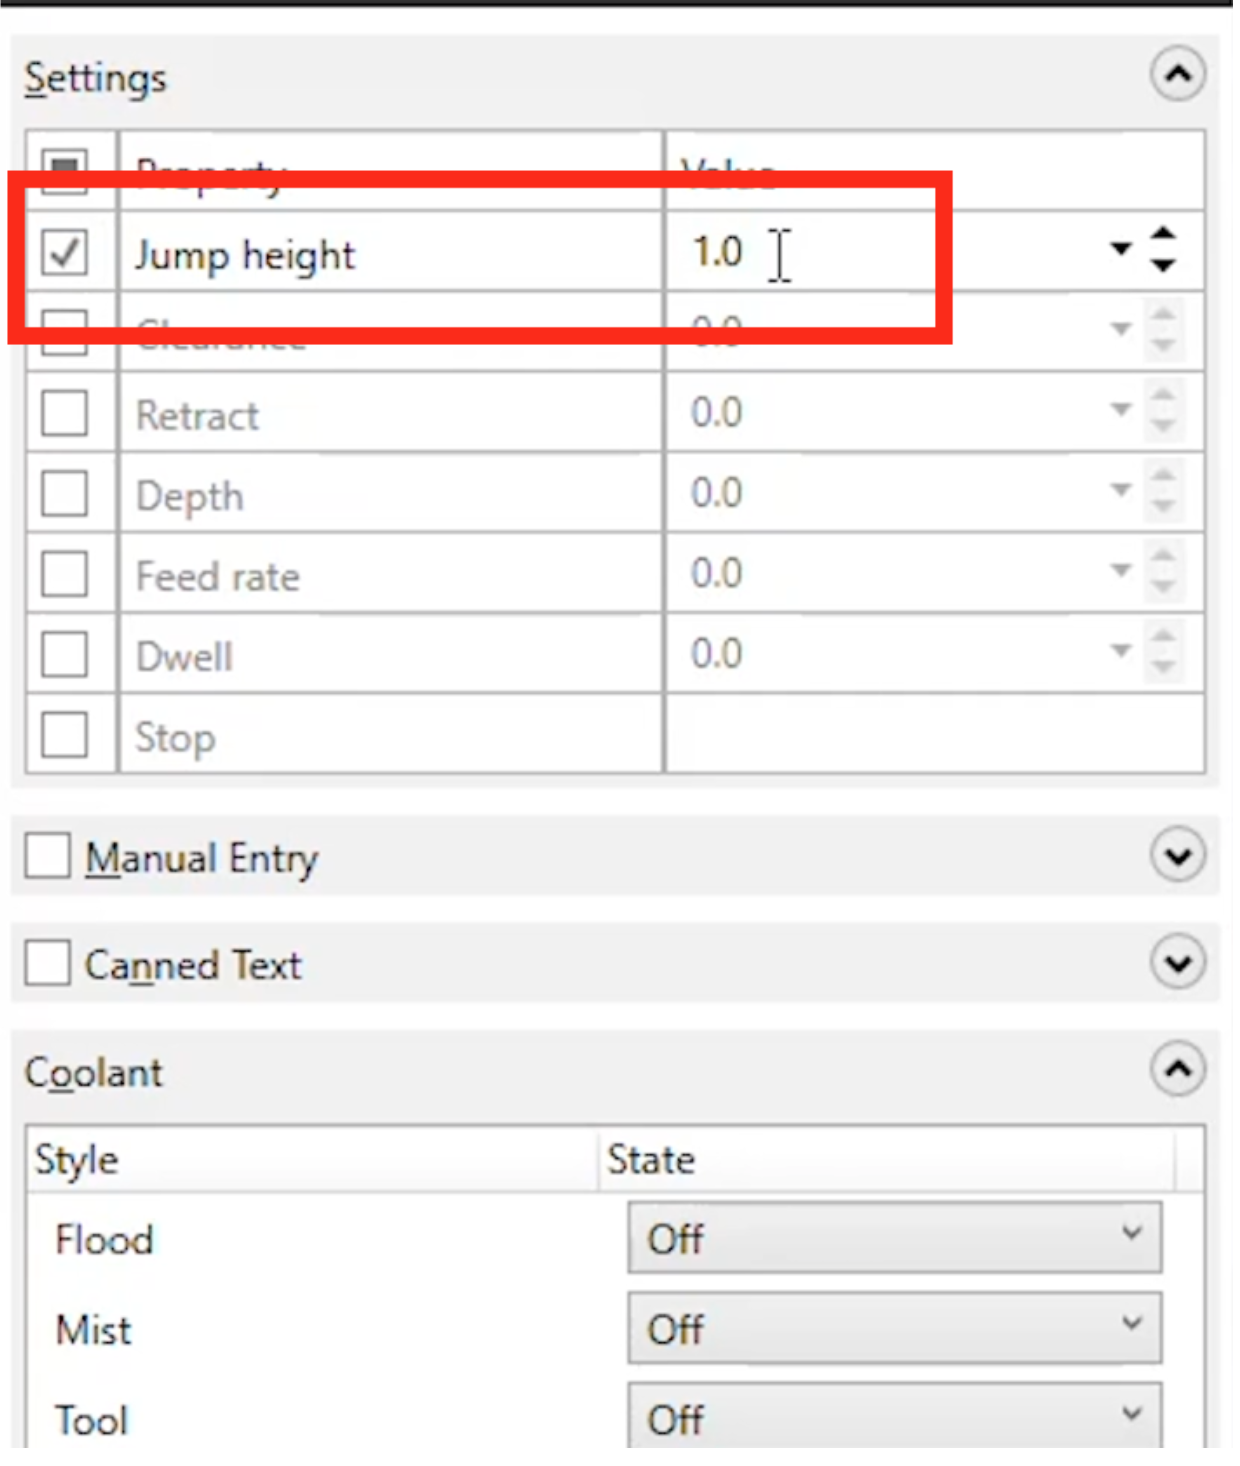
Using this next piece of geometry as an example, let’s say we wanted to clear a clamp in between the holes.

By reviewing the toolpath, we found that our clearance was only used at the start and end of the operation. We could increase our retract value, but that would add potential air pecking to every feature. Instead, we added a Jump height to the hole directly before the jump location in our cut order. Once we regenerated the toolpath we had a single jump added to the cut without needing to modify the entire operation.
As you can see, this option allows you to consolidate operations and apply custom settings to any single feature in a specific toolpath. Please be sure to sign up for our 2-Minute Tuesday video series to receive tips and tricks like this one in video form every week. More info at the button below.
Leave A Comment