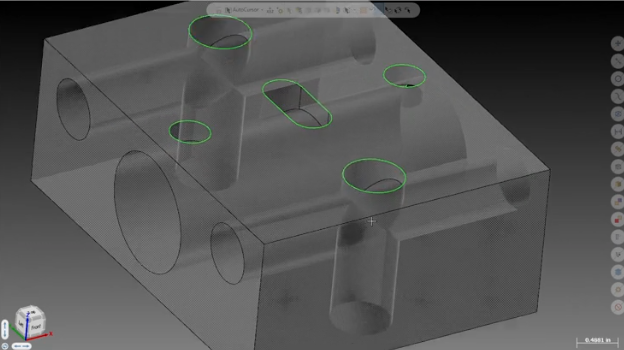
This post will show you how to utilize the Mastercam Multiaxis Deburr toolpath in 3-axis machines to eliminate the need for secondary deburring operations. Some parts have intersecting features that would normally require a machinist to deburr and break the sharp corners by hand after machining. The Mastercam multiaxis Deburr toolpath can eliminate this entire secondary process.
Here’s how it works
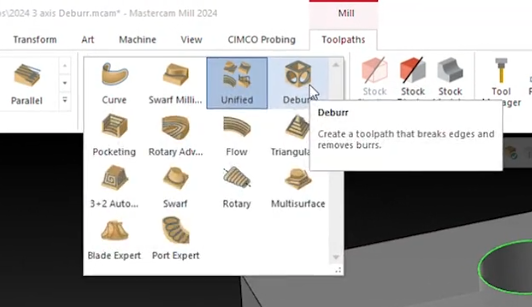
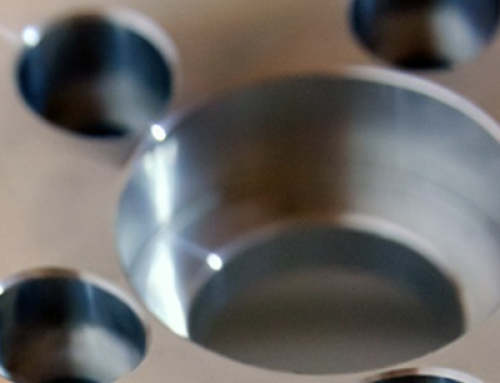
Begin by selecting the Deburr toolpath from the Multiaxis drop-down. In this example, we used a 5/16th lollipop cutter for the tool.
Next, select the entire part as your machining geometry to ensure proper collision control, set your edge definition to User-defined, and select the edges you wish to deburr.
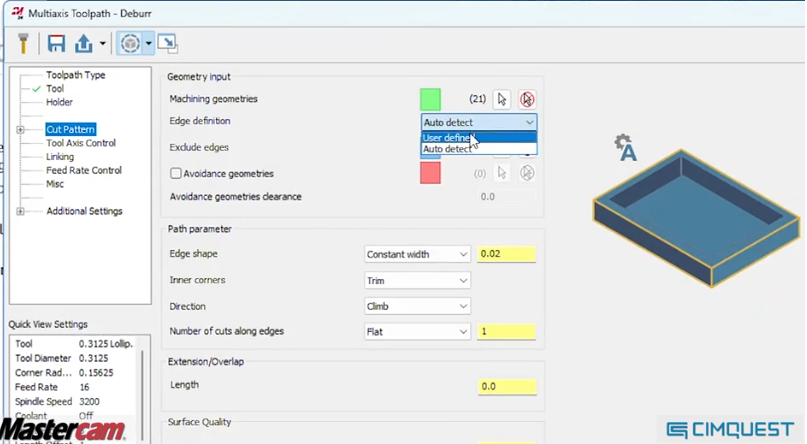
The color display will change after selection allowing you to easily double-check your work.
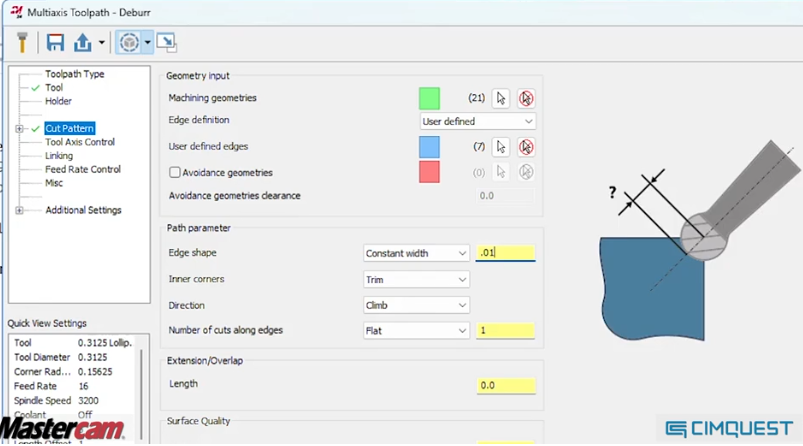
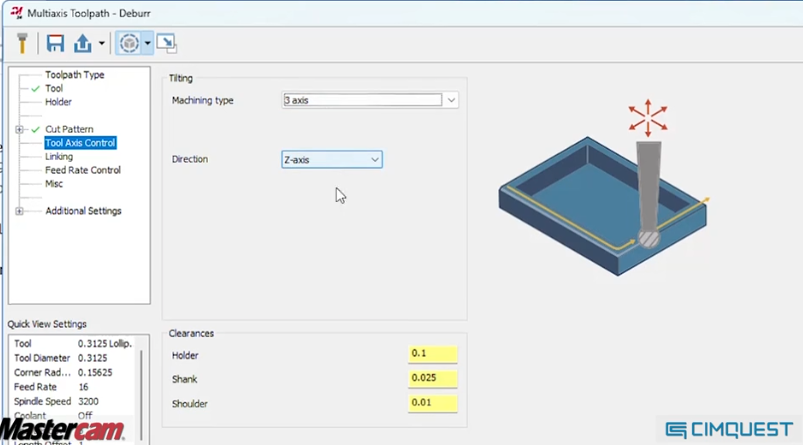
Now set an edge break of .01”, set your tool axis control to 3-axis in the Z direction and double-check your clearances.
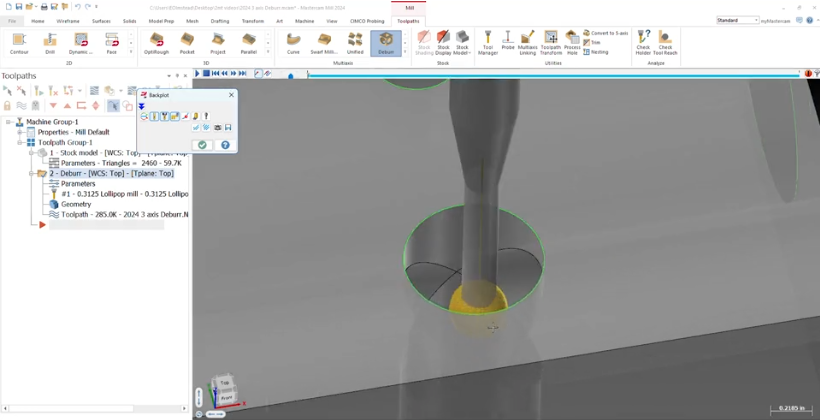
Lastly, you can set up some basic linking values and generate your toolpath. Checking your toolpath in backplot and verify shows clean motion with smooth entry and exit without collisions giving you a perfect .01” edge break around your edges.
As you can see, utilizing this Mastercam Multi-axis Deburr toolpath will not only save you time but it also ensures quality repeatable edge breaks without the need for secondary operations, so you can spend more time at the machine running parts and less time deburring them.
Please be sure to sign up for our 2-Minute Tuesday video series to receive tips and tricks like this one in video form every week. More info at the button below.
Leave A Comment